
|
|
|
|
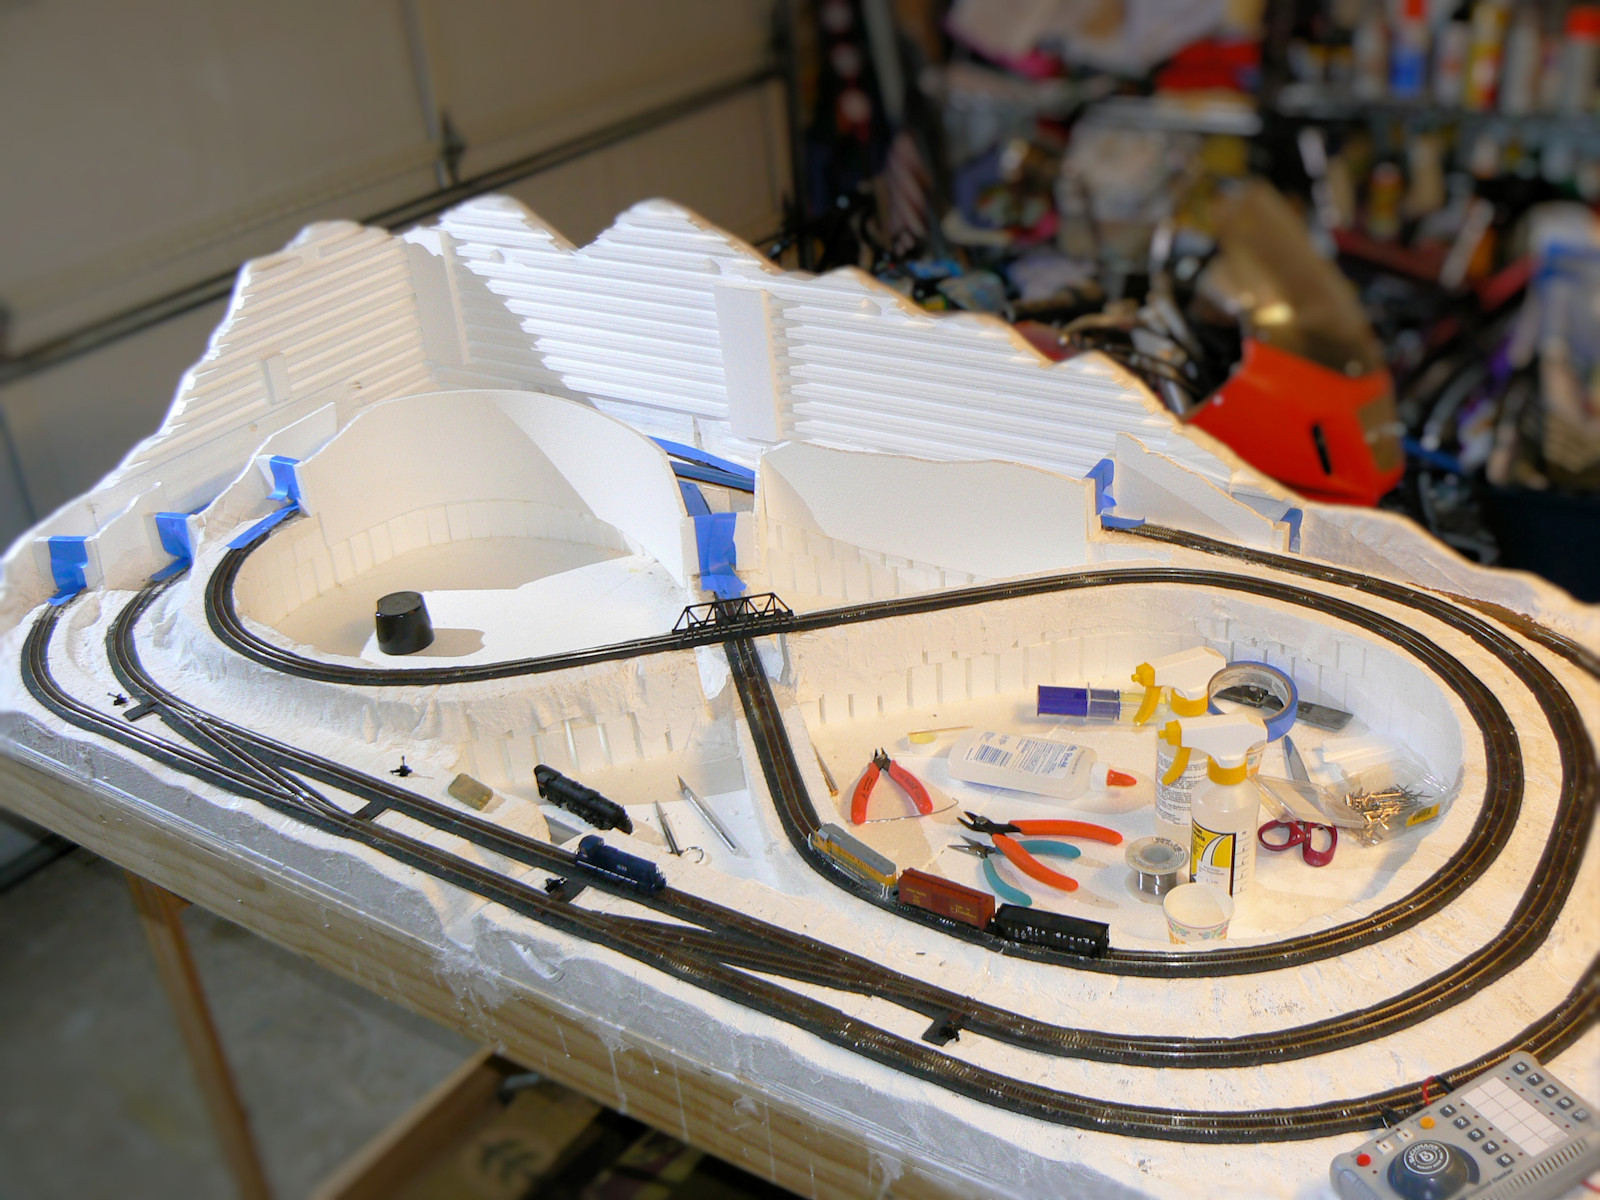
This first photo shows the complete black foam track bed and track glued and pinned to the styrofoam risers. It also shows some tunnel portals and walls for what will eventually be a mountain at the top left. As I mentioned before, it was a bear to get all the track to realign after removing some of the layout as the Woodland Scenics instructions requested. Now, with the help of a couple of extra track pieces here and there, I have realigned and refit everything and glued it all into place.
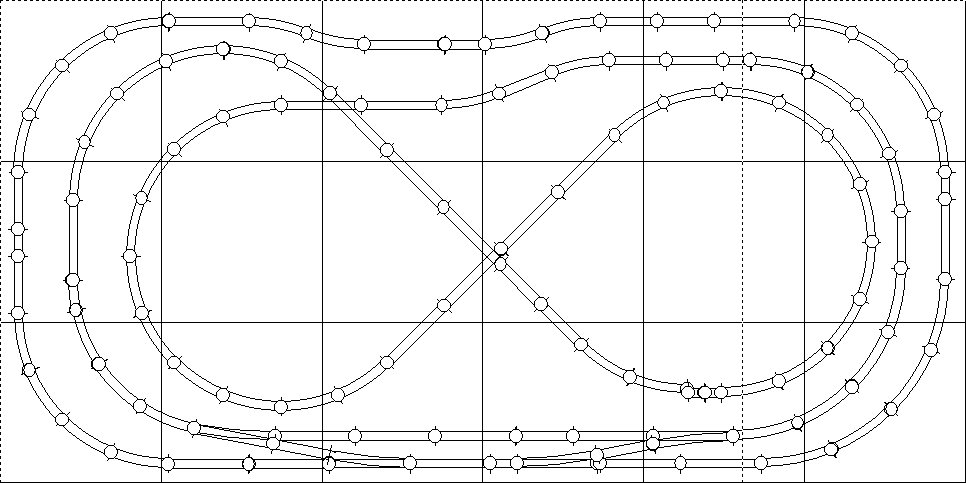
Here is a link to my original track layout design. Sorry, I do not have a track parts list or any labels to say what track pieces I used.
Note also that I have some plaster cloth under some of the track areas. This is the same plaster cloth that doctors used to set
a broken limb. It is fun to use it and make mountains and hills and gullies.
|
|
|
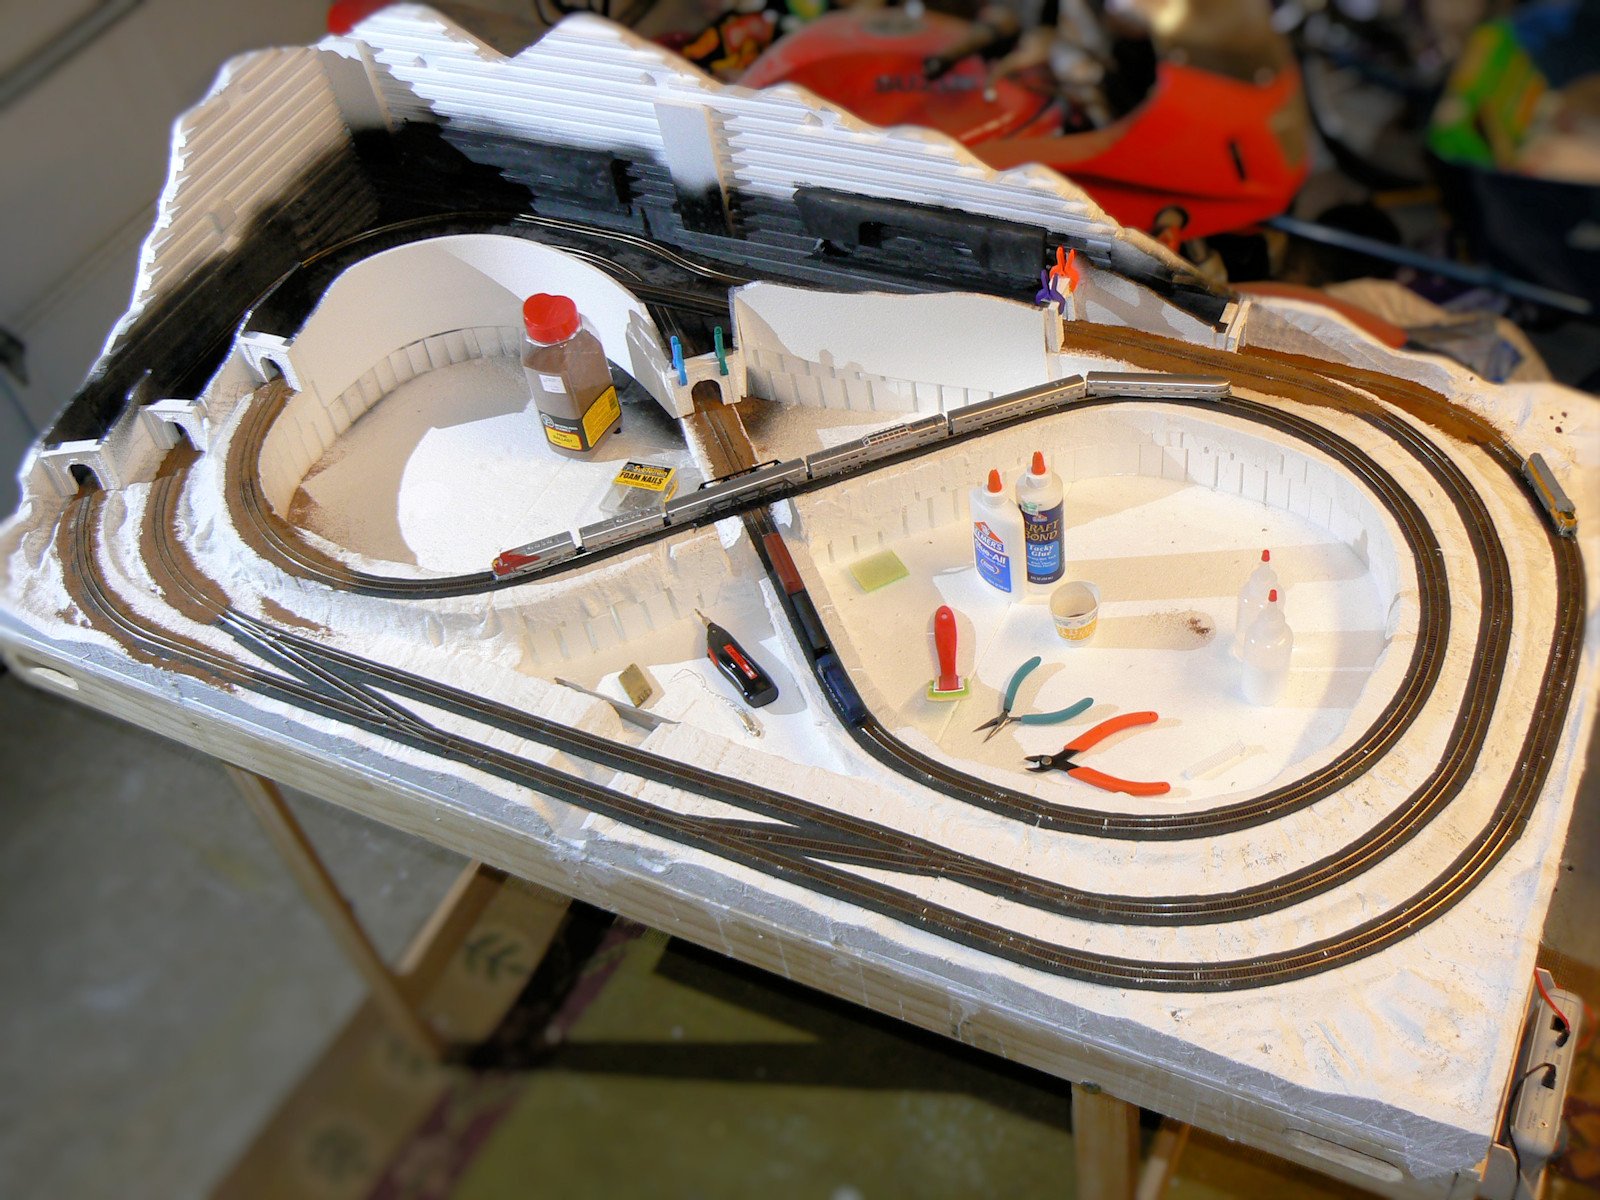
You might also note a Bachmann Digital Command Control (DCC) controller at the bottom right. This transformer can control and send signals to 10 or more locomotive engines. For those model train old timers who used to use switches and multiple circuits on a track, this type of DCC operation really simplifies your train set. You have one live track circuit and many smart locos that only react to signals you send to it. It is lots of fun to play catch up and dodge em with all the trains running on one track.
Also note that I have the tunnels taped up. The next step is to make the tunnels dark.
|
|
|
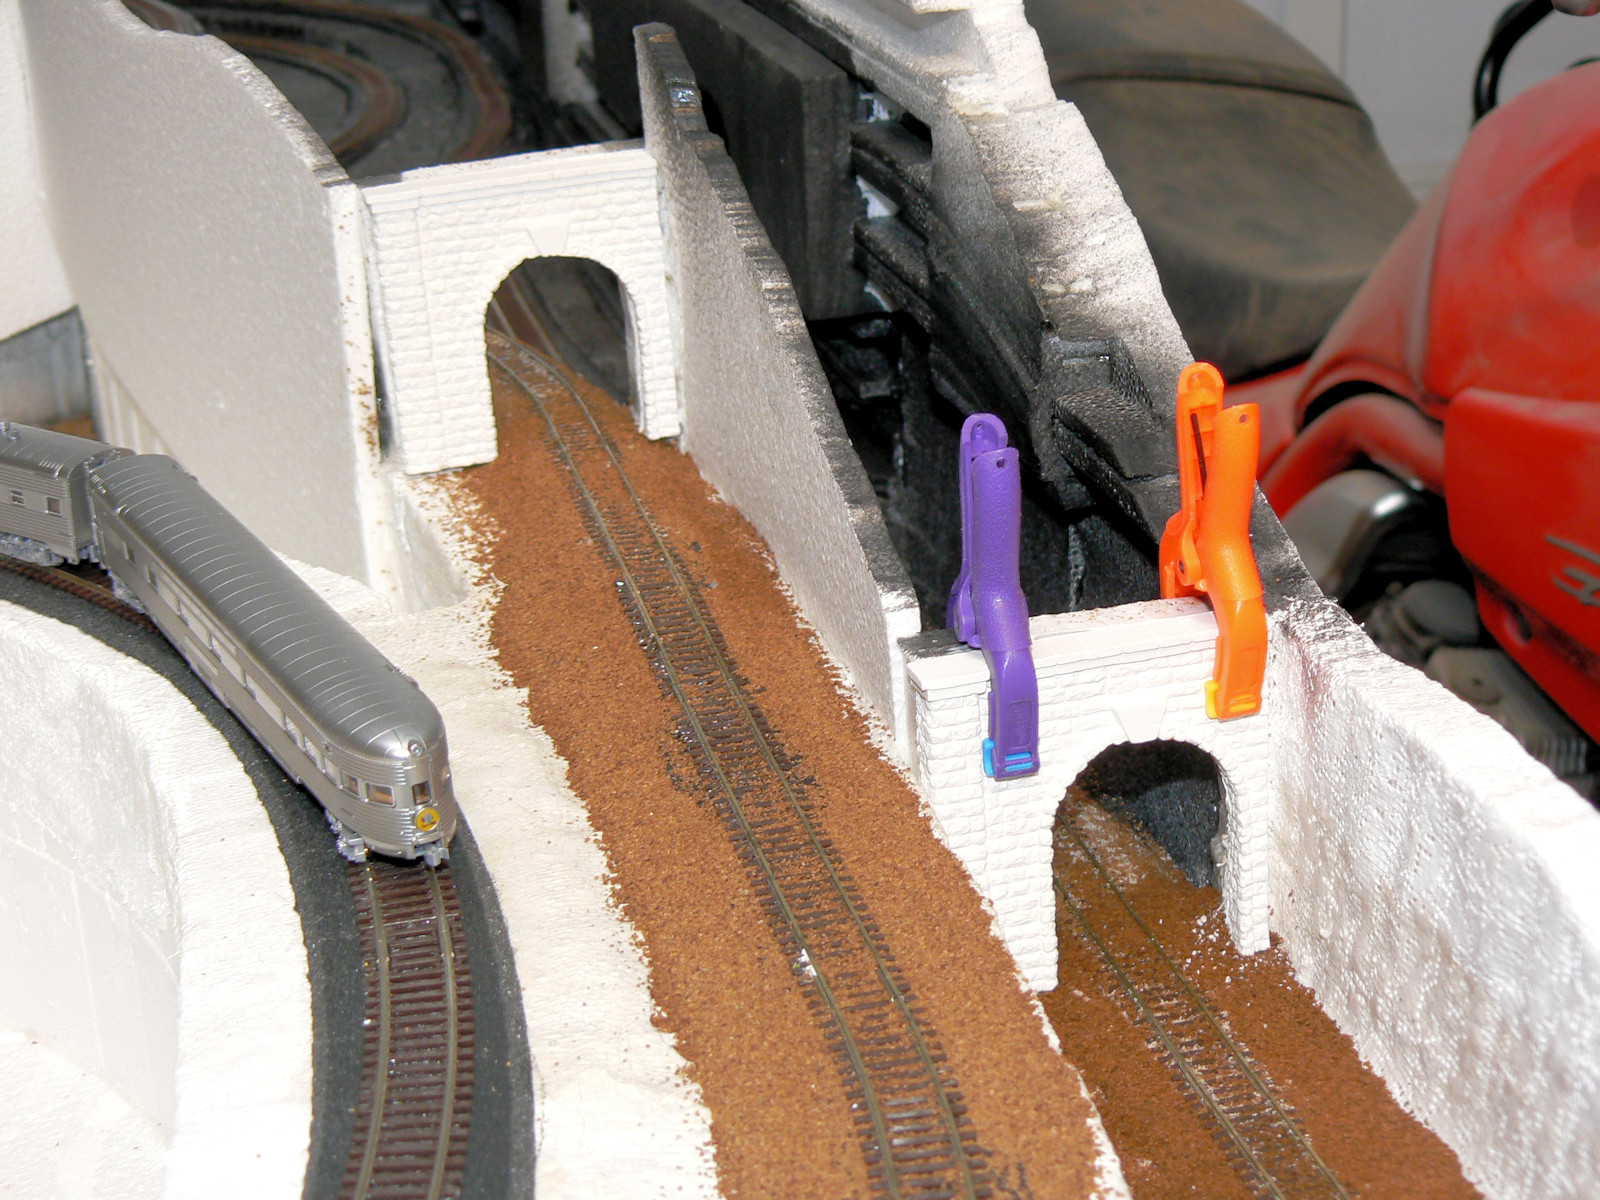
Woo hoo, also notice the Santa Fe (red and white) Super Chief F2 engines pulling the four passenger cars across the bridge. Both
the A and B units are powered and both respond to the same commands. What is nice about this arrangement is that having two units
makes this a very powerful pulling unit. I will someday get more passenger cars for this train. Additionally, this combo is the
smoothest running loco in my stable. If ever the A or B unit hiccups on some dirty track, the other unit will push or pull the
train to safety.
|
|
|
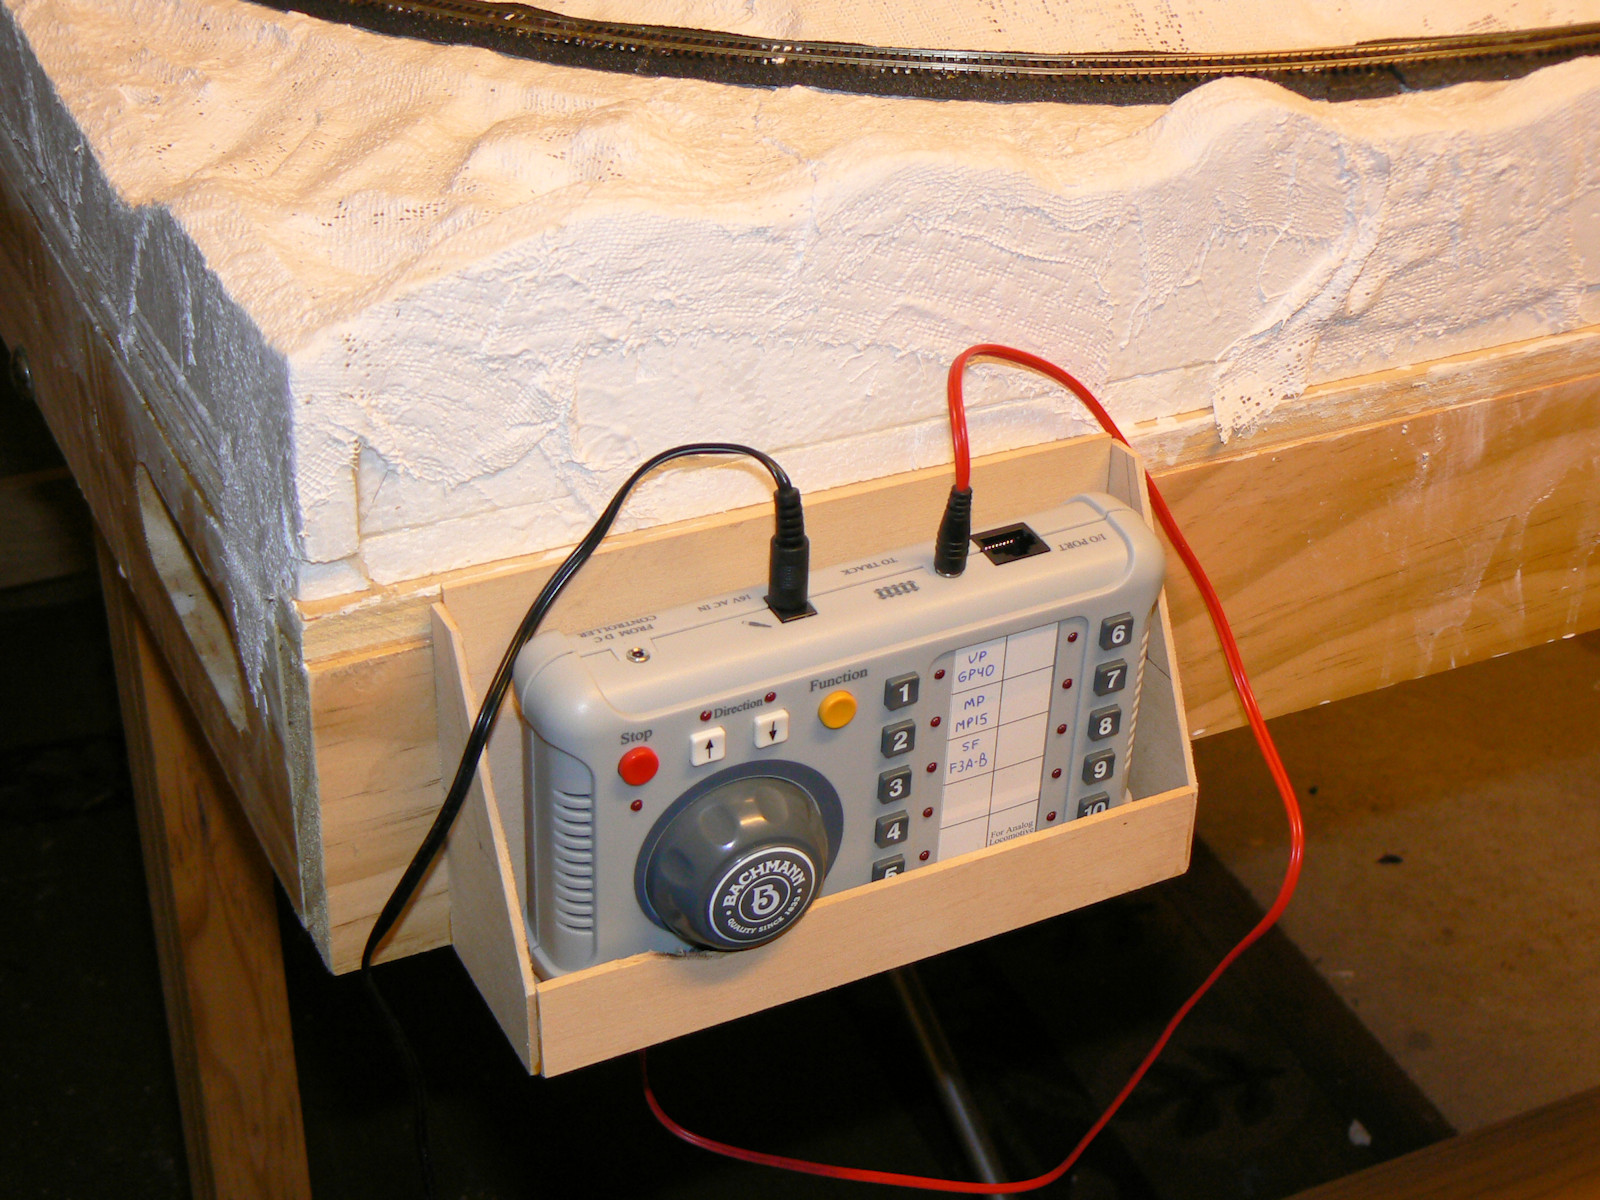
You can see this controller has a big throttle knob and a few buttons for direction. On the right side is a 10 button pad for
quickly selecting one of 10 locomotive engines. They give a little window with a card for writing out loco names. Since I don't
envision having more than 10 locos, I have no problem writing in all the engine names.
|
|
|
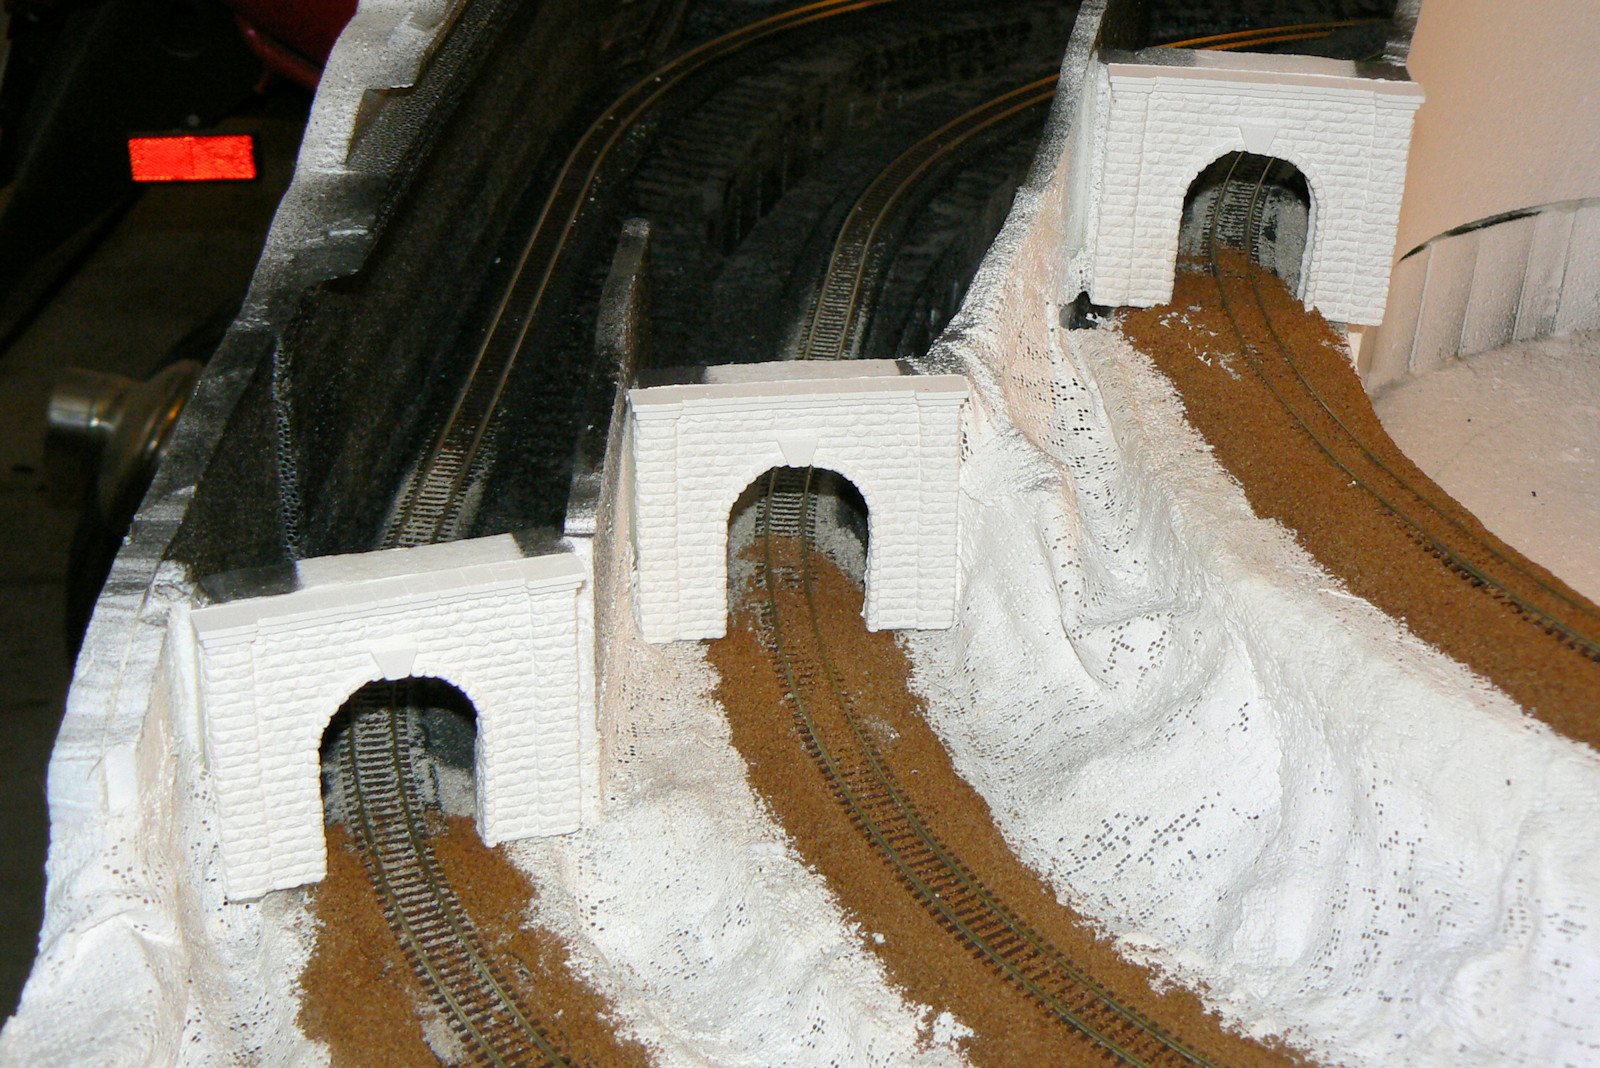
As I mentioned before, here is my technique for ballasting. Using a funnel or paper cone, place the dry ballast over the track and bed. Then use a flat brush to get the ballast off the rails and ties. Then I use two nalgene squeezy bottles to wet and glue the ballast. The first bottle has a mix of 70% water and 30% isopropyl alcohol. Drizzle this lightly over the ballast and try to soak the ballast without blasting it or pushing it all over the place .The second bottle has a bit of scenic cement or simple white glue diluted with water. The glue should be the consistency of whole milk. Drizzle this onto the wetted ballast. Let it dry overnight and by the next day you can vacuum and clean up any dirty rails.
Lastly, notice the "random stone" portals that are now facing the tunnel entries. These castings are from Woodland
Scenics and are made with their lightweight hydrocal, a fancy name for Plaster of Paris. I had to saw down the stone with a Dremel
tool to get them to fit in the tight layout.
|
|
|
The photo also shows the unpainted plaster cloth and portals just waiting for some sort of earth colored wash.
Other articles in the scale train series include:
Thanks for reading my articles. More train layout photos and articles will be posted in the near future.