Scale Armor Revisited

|
|
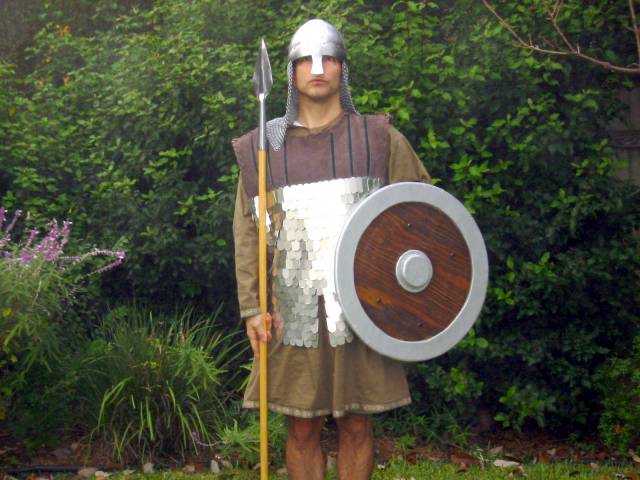
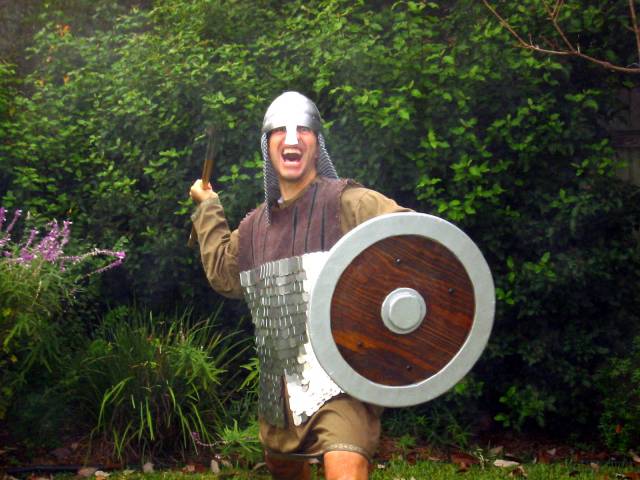
Foot soldier at attention
|
Regular visitors to this site probably know that a few months ago,
I made my first attempt at fabricating scale armor.
That attempt ended in discouragement due to the amount of labor in
construction and the exorbitant cost of materials and time.
After long deliberation, I came up with many new time and labor saving
techniques that I will share with you here.
Although I ultimately ran out of aluminum, I did partially complete the
scale armor you see in the photo at right.
I will update this article with more photos once I complete the armor by
attaching scales all the way up to the shoulder line.
Scale armor is an ancient armor that was popular from 200 B.C. until about 800 A.D.
It is made by sewing small metal plates to a leather or canvas backing.
The scales can be made from steel, bronze, or brass, but
I have opted for the more trouble-free, modern aluminum 6061 T6 alloy
which is lighter and shinier than its ancient counterparts.
Scale armor is more effective than mail against bludgeoning or crushing blows,
but slightly less effective at upward slashing or piercing attacks.
Roman troops, who called the scale armor lorica squamata, were very fond
of this armor, often reserving its use to cavalry, officers, and standard bearers.
My dress at right is an amalgam of various pieces approximating an early
Saxon foot soldier: tunic, common spear, simple shield, spangen helm.
The scale armor and mail helm curtain suggest a bit of wealth or
some nice family heirlooms.
|
|
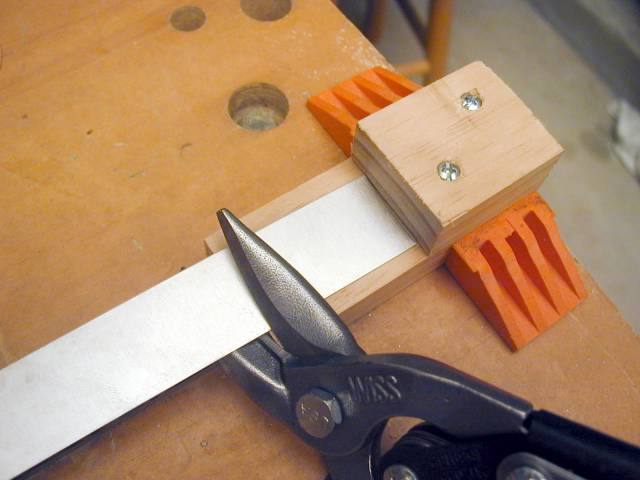
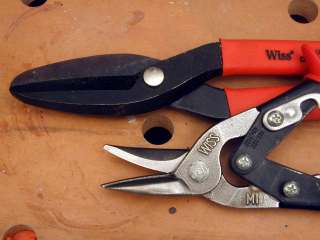
Cutting Tools
|
Now on with the construction!
The first improvement over my previous construction attempt was to get
a better set of sheet metal cutters.
Earlier I used the tin snips at top.
Although they had 12 inch handles, they still caused some blisters after
repeated use.
In this project I used the aviation shears at bottom.
The pivots of the tool provide excellent leverage so even
though the tool is only 9 inches, the cutting is easier.
Aviation shears come in three styles denoted by their green, yellow,
or red handles: right, straight, or left cut.
Because I cut with my right hand, I opted for the
leftward curving cut of the red handled version.

|
|
Scale cutting jig
|
Time saving hint number 1: a jig is faster and more repeatable
than measuring.
In the previous attempt, I carefully measured the 1 inch wide sheet metal
strips into 2 inch lengths. I then carefully cut along each marking.
In this attempt, I made a wooden jig out of two pieces of wood screwed
together.
I simply feed the wood until it hits the upper wooden fence,
and snip along the bottom wooden block.
With this new technique I can cut the entire 48 inch strip
into 2 inch scales in about 2 minutes.
Incidentally, I ordered a total of 80 feet of 1 inch wide by 0.025" thick
(24 gauge) aluminum sheet metal for the project.
This was enough for about 80 percent of the front of the armored
vest.
I suggest 100 feet for the front of a vest as shown in the picture,
200 feet if you are doing both sides of a vest, and 250 feet if you
are doing short sleeved arms as well.
The 0.025 inch thick aluminum is about twice the thickness of
an aluminum beverage can.
This is nice for reenactment, but too thin for actual combat. You
may wish to use steel or a thicker gauge for combat.
I purchased my sheet metal at Online Metals.
|
|
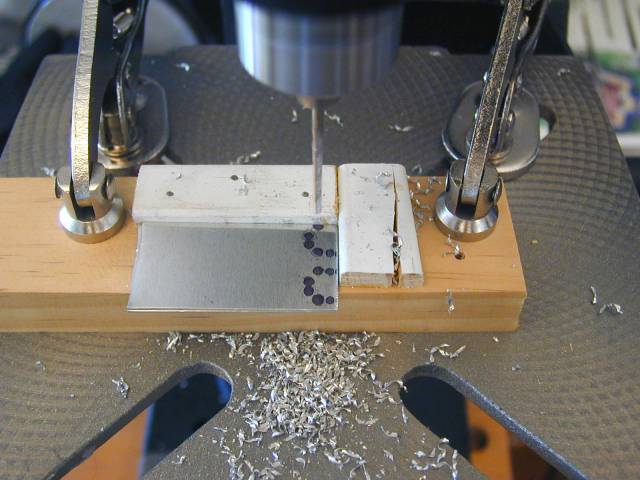
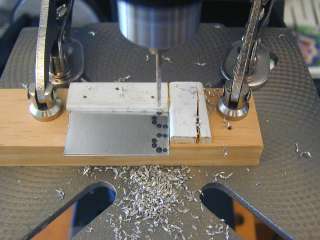
Scale drilling jig
|
This photo again illustrates the time savings of constructing a jig.
Here two pieces of wooden molding are nailed to a wood block forming
a frame for the scale.
The block is precisely clamped to the drill press to place one of
the holes in the scale.
The scale is flipped over and drilled a second time.
The two holes are properly spaced to accept the fastener that
holds the scale to the leather vest.
Aluminum is so easy to drill that one can stack 3 or 4 scales
against the frame and drill them all at once.
Like a crazed factory worker, I drilled through nearly 1000 scales
in about 90 minutes.

|
|
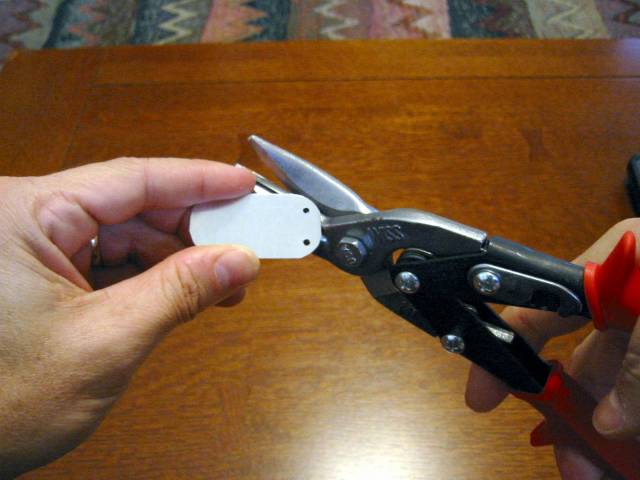
Rounding corners
|
This photo shows how I cut the shape of the scale.
I simply rounded off the four corners with the aviation snips.
The ancients used all sorts of shapes for scales.
Some shapes were pointed. Some where rounded on two corners only.
I opted for the four corner round since that would be least likely
to snag the vest or scratch the wearer.
In the previous project I sanded the edges of the scales for fear of
getting scratched.
These snips cut so nicely, I did not get scratched even with no sanding.
Also, slight burrs from the drilling process simply flaked off with
no splintering or cutting.
Burrs might be more injurious with steel.
This was a very time consuming step.
I watched three or four football games (16 hours) while cutting the 1000 scales.
I'm sure some sort of pneumatic scale punch would have been faster and
made more uniform scales, but I like the variation and hand-made look
of the manual cutting.
|
|
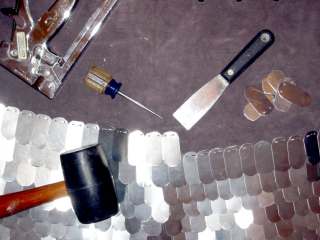
Leather Tools
|
This photo shows the collection of tools needed to affix the scales
to a leather vest.
I opted to use modern steel staples to staple each scale to the leather.
It would have been a huge time saver to find a really strong staple gun
to go through the aluminum and leather in one blow,
but in the end I had to drill holes in the aluminum and punch holes
in the leather.
I use 1/4 inch long staples for single thickness leather, and 3/8 inch
staples for double thickness leather around the hems of the garment.
The awl and the rubber mallet are for punching holes in the leather.
"I really gave this project my awl," said the leather worker.
The steel spatula is for bending the staples closed.
|
|
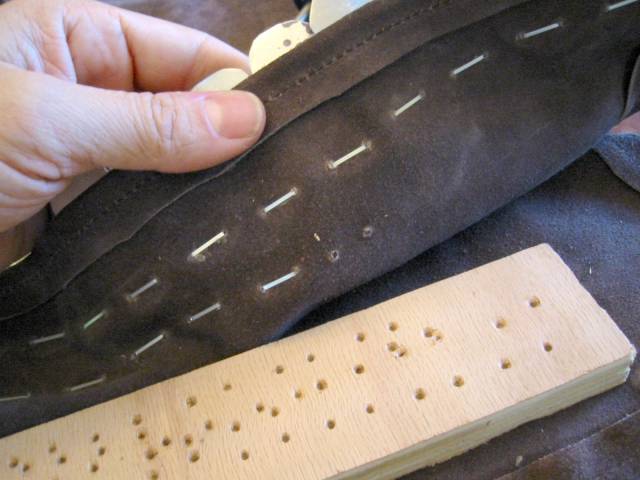
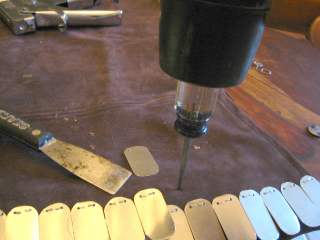
Punching holes
|
Bang! The mallet pushes the awl through the leather.
The vest is the $89 Medieval Hunting Jerkin
from By The Sword, Inc..
I opted to have the staple closures face outward.
I thought this would be less likely to scratch the wearer,
but in the end, I don't think it matters.
It is very hard to get scratched if you close the staples tightly.
This photo also shows the scale pattern.
Notice that the rows are shifted half a scale so that each scale
covers the seam of the two scales below.
Also notice that I made the overlap about half the height of a scale.
You can make stronger armer by making more overlaps.
The ancients also made the armor strong by affixing each scale to
its neighbors in the row.

|
|
Leather backing
|
Be sure to punch your awl into a bit of scrap wood rather than an expensive table top.
This photo shows the back side of the garment
and the nice pattern the staples make as the armor
is completed.
|
|
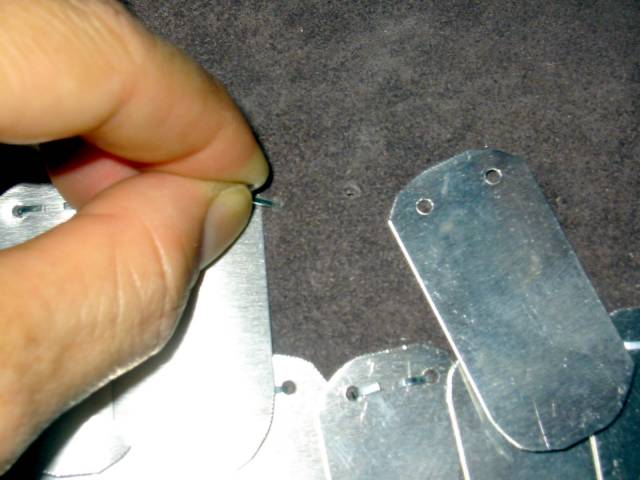
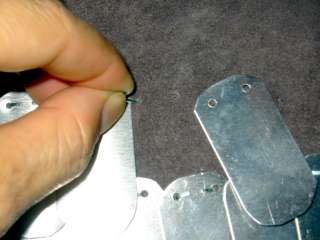
Threading the staples
|
Here is a close up of fixing a scale to the leather.
Rather than pick up the garment and work from the back with every scale,
I simply thread the staple like a fish hook through the two holes and close the
staple from the front.
This is a big time saver over the sewing and Velcro method of my previous contruction attempt.
I can easily sew about 50 scales to the vest in about an hour with this method.
Hint: once again I was watching a movie or a football game while working.
More strength can be added to the armor by making additional holes
at the sides of the scales and affixing each scale to its neighbors.

|
|
Charge!
|
It may not be completely historically accurate, but I do like
the look of the armor.
The aluminum is lightweight and gives a nice chuffing sound
as you walk, somewhat like a hundred tiny marching feet.
I will be ordering more aluminum and finishing the front of the piece
by running the scales all the way up to the shoulders.
I hope this article is useful to you and helps you make your own
set.
I would appreciate any photos or email concerning armor that you make.
Also see my previous armor-related articles:
Thanks for visiting.