Make a Five Dollar Spangenhelm

|
|
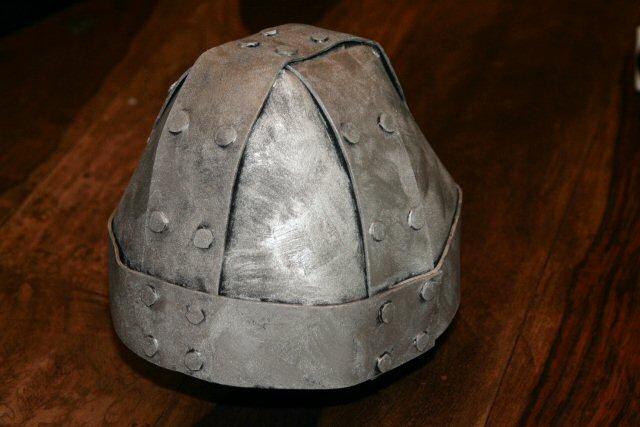
Finished Helm
|
This article describes how to make an inexpensive ancient warrior helmet
known as a spangenhelm.
This type of helmet was very popular from 100 A.D. through
King Arthur's age, the Viking age, and on to the Saxon and Norman
conflict of the eleventh century.
You can see this helmet in movies such as
Lord of the Rings, King Arthur,
and Alfred the Great.
The spangenhelm was the basic protection of the foot soldier
one thousand years ago.
You can make a replica spangenhelm with less than five dollars of materials, some
common tools, and 3 or 4 hours of hobby time.

|
|
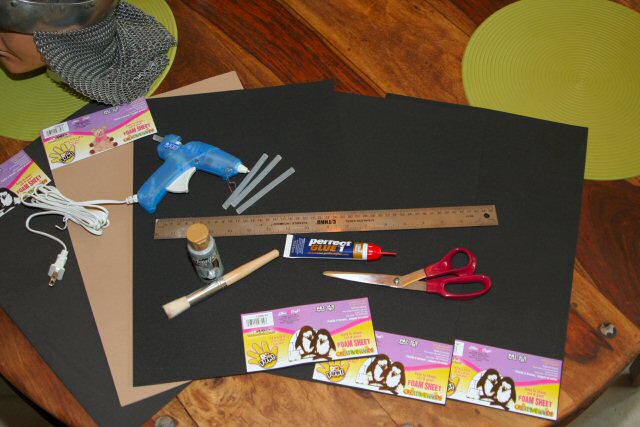
Materials and tools you need
|
The photo at right shows most everything you need.
Start with 5 sheets of 30 x 45 cm (12 x 18 inch) foam rubber. This is 1 mm (1/32 inch) thick
sheet that you can buy at craft stores such as Michael's or Hobby Lobby for about 75 cents each.
The brand I used was from Creative Hands and
commonly is used for craft projects such as scrap-booking.
Get 4 sheets of black and 1 sheet of tan.
You will also need a 60 ml (2 oz.) bottle of acrylic silver paint to give the helmet a metallic finish - also
about 75 cents.
You can use copper or gold or any color you like. Textured spray paint also makes a nice finish
on such a helmet, although enamel paints are not as flexible as acrylic.
For tools, you will need scissors, a paint brush, a ruler, and a hot glue gun. A hot glue gun is desirable because
you put the glue on the foam, hold the pieces together, and 10 seconds later the glue is dry, and you are ready
to move on. Other glues tend to take longer. Younger kids may need help so they don't get a burn from the glue.
Once dry, the hot glue is stronger than the foam around it.
You also need a table or work surface. Please don't cut or get glue on someone else's good table.
A useful optional tool is a mannequin head or wig stand.
This helps you form the helmet and hold it in place while the glue dries.

|
|
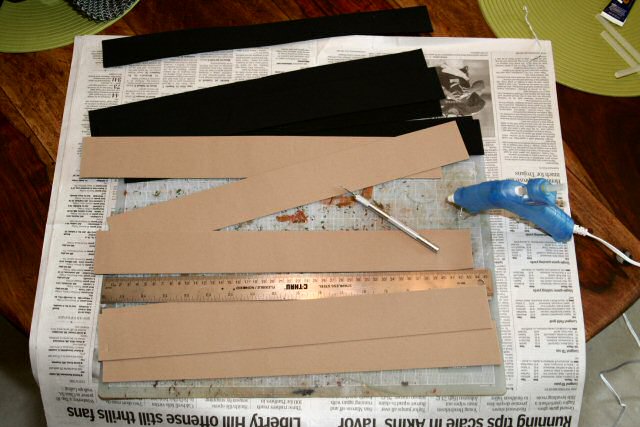
Lots of Bands
|
Step one is to cut 5 5 cm (2") bands from the tan foam and 10 5 cm bands from the black foam.
This cutting should use up your 1 sheet of tan foam and 2 sheets of black foam.
Here I use a razor knife and a metal straight edge to make it go faster.
There is also a mat board and some newspaper underneath to make sure I don't damage
the breakfast table.
|
|
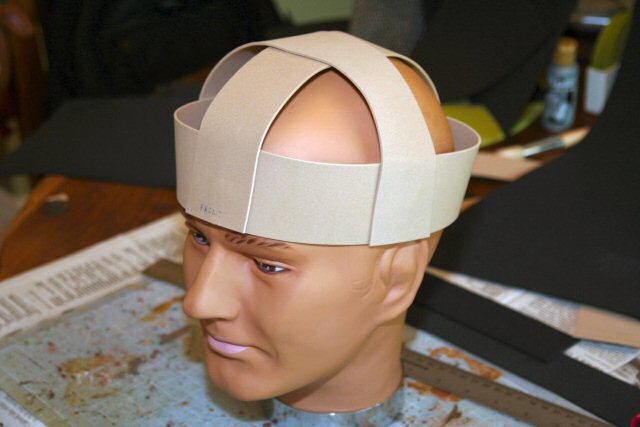
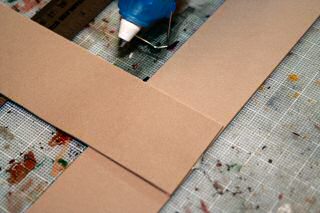
Make a T Head band
|
Believe it or not, a 45 cm (18") band is not long enough to make it around most heads.
My own head is about 55 cm (22") in circumference, big enough to hold all these thoughts
about spangenhelms.
Start making the tan helmet liner with a T shaped intersection of 3 bands as shown in the picture.
The two arms of the T will form a head band around your skull.
The body of the T will form the crown of the helmet liner and go over the top of your head
from front to back.
Use paper clips to size the helmet liner to your head before gluing.
You might want to leave a little room in case your head or hair grows,
or you decide to wear this in the winter over a hat for warmth.

|
|
The inner liner bands
|
This photo shows the completed helmet liner.
Basically is a head band with two bands that form the crown of the helmet.
Once band goes over the top from front to back. The other band goes
over the top from left to right.
|
|
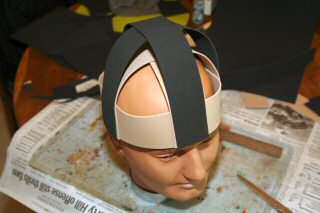
The inner steel bands
|
Now take two black bands and make the inside form of the helmet.
These black bands can closely follow the helmet liner to make a head-hugging cap
type helmet, or they can go way high in the air to make a tall conical helmet.
Here, I have gone about 5 cm above the liner, which is probably typical
for most Saxon helmets.

|
|
Spangens or quarter panels
|
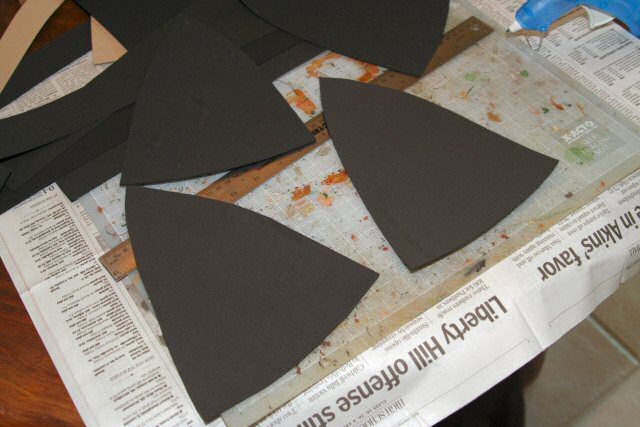
From the remaining two black foam sheets cut four quarter panels for the helmet.
These are also known as spangens from which the helmet gets its name.
The panels are shaped like sections of an orange - somewhat triangular but
with slightly bulging, curving sides.
The shape of the panels depend on the size and the height of your helmet.
Hold the sheets to your partially completed helmet to get the approximate shape.
Cut them larger than you need. You can always glue the oversize panels in place
and then trim them in place to fit the helmet.
|
|
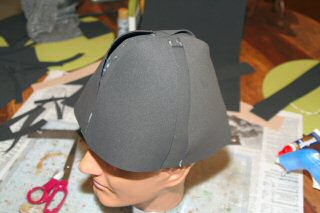
Formed panels
|
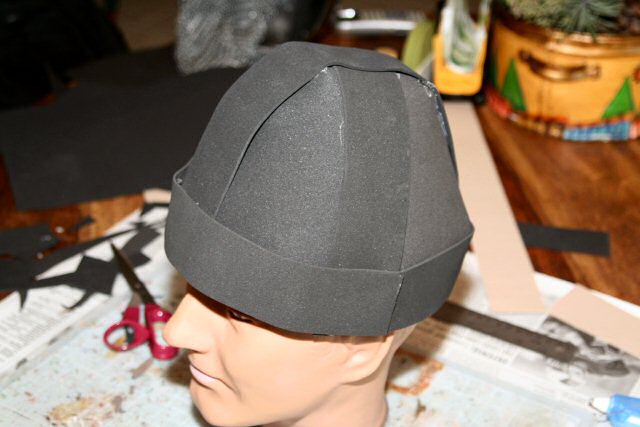
Here is the most difficult step of the entire project - shaping the
quarter panels to the helmet.
This photo shows the 4 quarter panels in place.
It is best to glue one bottom corner of a panel into place, and
then go round the bottom, gluing a little bit at a time.
Once the bottom is done, glue the panel up to the crown,
gluing and holding in place a little at a time,
The foam sheets will fight your every move. It does not want to curve.
Glue and hold, glue and hold. A little at a time.
If you have any strange puckers or folds, you can cut a small notch
to help the panels follow the curve of the head.
These small notches should only be made at the very edge of
the panel so that they will be covered up later.
Do not make a notch extend toward the middle of the panel or
it will be visible later.
As you see, my helmet has a somewhat strange shape at this stage.
Don't worry if your shape is not perfect. The outer bands
that come later will make the helmet more round.

|
|
Outer bands
|
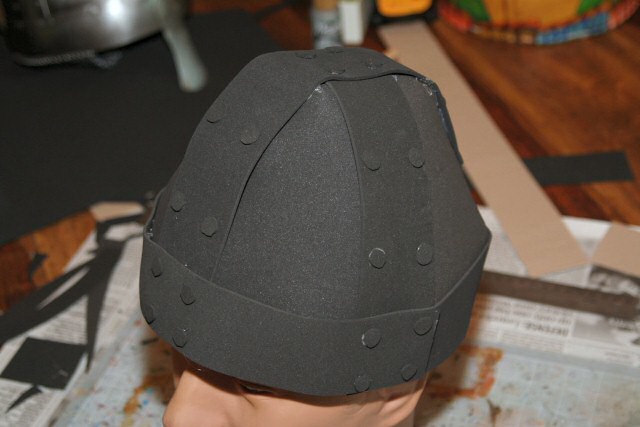
Now take the remaining black bands and put outer bands over the top of the helmet.
Then take the last band or two and once again make a head band around
the circumference of the helmet.
The order here is important. First put a band across the top from
side to side. Then put a band across the top from front to back.
Lastly, put the "head band" around the circumference of the head.
This is how it is done with real helmets and is done to help
the strength and construction of the helmet.
These outer bands round the helmet and help lock the spangens in place.
|
|
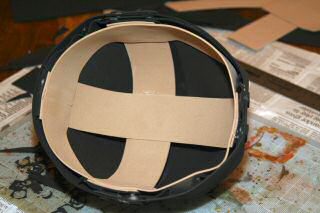
Finished Inside
|
Here's a quick peak inside the helmet.
It looks just like a real one except we are using foam instead of straps of leather.
If you like, you can fix a chin strap to the liner for looks or to help the thing stay on.
I found that the foam helmet is so lightweight that it does not need a strap.
You can also fix cheek pieces to the side or an aventail to the back if you want
variety or want to model a more Gallic or Roman looking helmet.

|
|
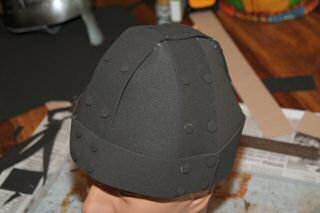
Rivets closeup
|
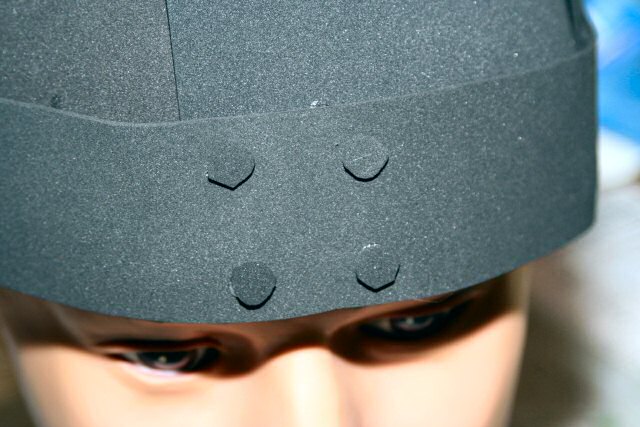
With some of the scrap foam, cut small circles to use as rivets.
Here is a close up of four rivets at the front of my helmet.
You can also use the spare foam to make a nasal guard or other frontal decoration.
The Vikings were fond of goggle-like eye guards.
The Saxons and others often made eye brows or other decorations to
help reinforce the band and guard against frontal blows to the face.
If you want to look like the Gauls (Asterix and Obelisk!), you
can add horns or wings to the sides of the helmet.
The Teutonic Knights had all sorts of wings and ridges.
Just be aware that many societies had both ceremonial and fighting helmets.
The ceremonial helmets had all sorts of decorations. The fighting
helmets tended to be more plain.
|
|
Finished Outside
|
Here the construction of the basic spangenhelm is complete.
Notice the rivets around the band and up the top of the helmet.
Place rivets where multiple sheets of metal overlap.
|
|
|
Finished Helm
|
Finally, I have brushed the helmet with silver acrylic paint.
Use a large, dry brush, and apply the paint to let some of the black show through.
This simulates the carbon of the iron and the aging and weathering of the helmet.
Textured spray paint such as the "hammered-aluminum" that is sold to refinish automobile
wheel covers is also good.
You can also try the green verdigris paint used for iron lawn and patio furniture.
Do whatever you like - these helmets are cheap to make, both in materials and time
investment.
Finally, notice this type of mock helmet is certainly more comfortable than a real one. It is
lightweight and breathable, and it does not leave nasty welts on your skull from
heavyweight pressure points. It also doesn't scratch you or catch and pull any of your hair.
And there is no need to oil and polish this helmet with steel wool. It is completely rust-free!
Well, I hope you enjoy making your own spangenhelm.
It won't win any re-enactors contests, but it looks great from 10 feet away.
It also works well for costumes and stage plays.
Best of all, it is the perfect accoutrement for playing ancient battle games and
watching your favorite sword and shield movies.
If you liked this article you might also like my other
articles:
Thanks for visiting and reading my web site.