Constructing a 3D Settlers of Catan Board
Part III - Finishing and Painting the Hexes
This article in four parts describes the construction of a three dimensional board
for the family strategy game The Settlers of Catan.
There are four major steps to making these hexes:
- Prototyping - sculpting and modeling the original piece for the hex.
- Mold making - making a mold that will be used to cast the pieces.
- Casting - repeatedly filling the mold to make hex blanks.
- Painting and finishing - sanding, priming, and detailing the pieces to make the final hexes.
In the previous article we described
Casting the Hexes
with the final result being a set of
blank hexes for a Settlers of Catan board.
we wish to cast.
This article deals with the last step of the process,
finishing and painting the pieces.

|
|
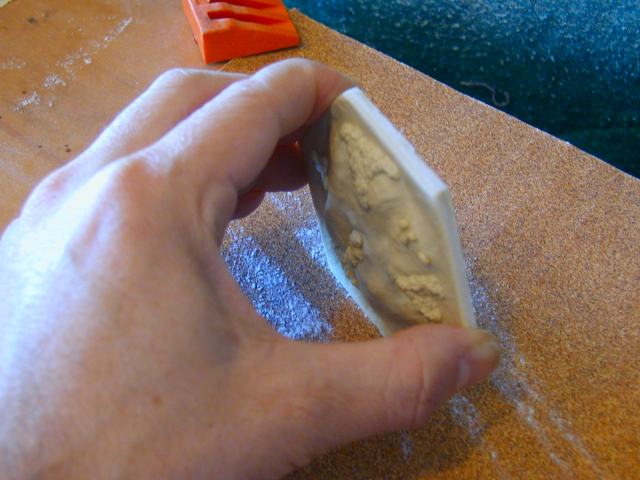
Sanding hex edges.
|
As a result of trimming the silicone molds, there often is an uneven edge
to the cast resin hex.
Invariably one must sand the hex edges to make them square and flush with
the adjoining hex.
Here I hand sand the edge using a 100 grit multi-purpose sand paper.
100 grit will leave scratches in the surface of the resin, but I enjoy
this look making
the part look less manufactured and more handmade.
The texture also takes the paint nicely.
Do not use the wood sand paper as the open edge grit often clogs with
resin dust.
Rather use the multi-purpose aluminum oxide grit (made for plastics and metals)
as this clogs up much less than the wood paper.
A better solution is to have a benchtop belt sander.
Unfortunately, I sacrifice yet another tool purchase for the sake of family
unity.
Actually, I have my eye on a $100 Delta benchtop belt sander.
This will save enormous amounts of time and manual labor,
but perhaps should be factored into the cost of this project.

|
|
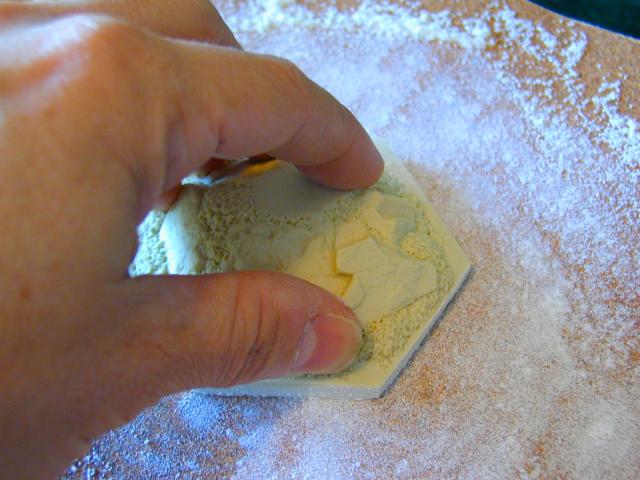
Sanding the hex base.
|
Also, since the mold is filled by hand, each one had a slightly different thickness.
The resin forms a meniscus at the top of the mold,
and owing to the slight lean of my work desktop,
there is likely to be a slight overpour towards one edge of the hex.
Here I sand the hex so that it lies flat and is the same height as the others.
The resin dust is unpleasant to breath, so I recommend a well ventilated area,
eye protection, and a dust inhaler guard.
Also a vacuum cleaner will cut down on the dust
and keep your sandpaper fresh and cutting.
|
|
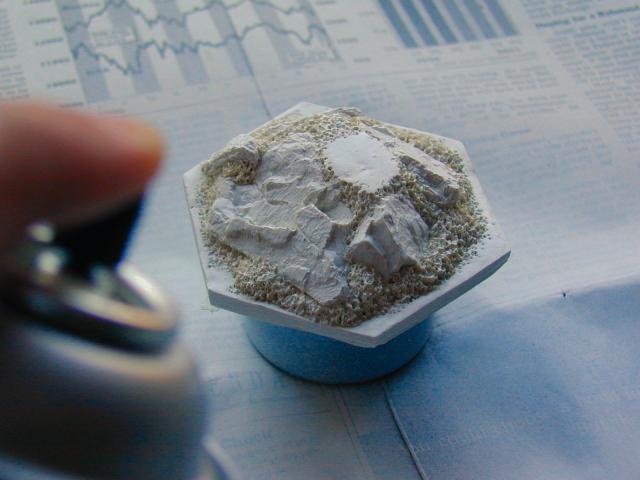
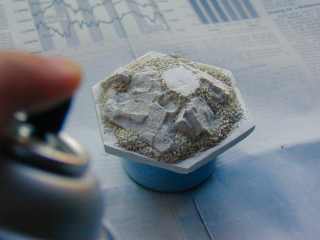
Painting a primer coat.
|
Once the part is sanded, wash it in soapy dishwater
to remove all residue and dust.
The first coat of paint should be primer to absorb any oily residue and
provide a nice dry, matte coating for paint to adhere to.
Oil-based enamel paints stick to resin the best, followed by water-based acrylic paints.
Avoid latex paints as found at many hardware stores.
These chip and easily fall off the plastic.
You do not have to put on a thick coat of primer, but rather
enough to coat the part.
As with any spray paint, avoid inhaling the fumes and use in a well ventilated area.
When painting I felt lightheaded at times, and this was my signal to go
walk the dogs and get out in the fresh air.
|
|
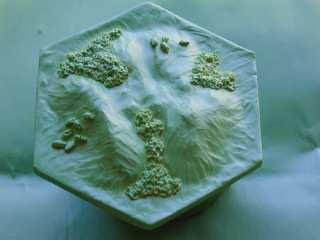
Painting a base color coat.
|
After a primer coat, your hexes are ready for a base color coat.
You could go for an ultra-realistic hex, but I decided to go for
a look that was halfway between playable and realistic.
As a result, I go for garrish, easy-to-discern base color.
Here the pasture/wool hex receive an lime green base color
to distinguish it from the dark hunter green of the forest.
The specific color I use here is Citadel paints "Goblin Green."
Citadel sprays have much more pigment than Krylon or Rustoleum paints,
but they are about 3 times more expensive.
I used some brands on some hexes, other brands on other hexes.
|
|
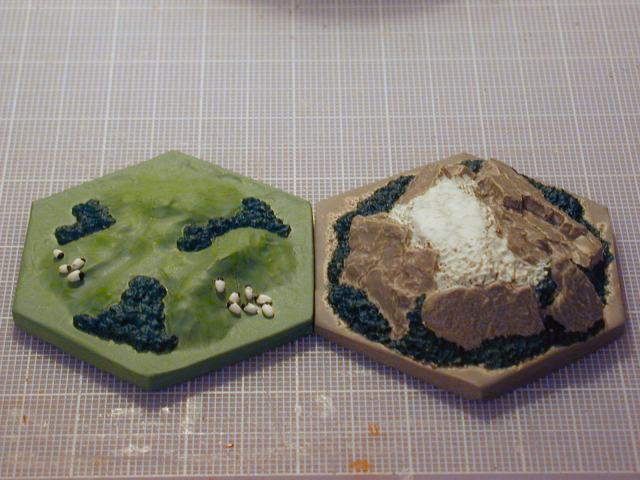
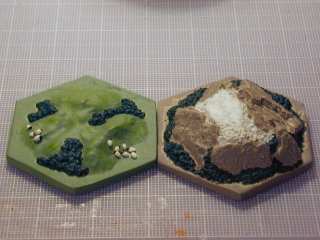
Some final prototypes.
|
And voila, now we see two finished hexes.
Both hexes have received hand brush painted details
and a bit of dry-brushing to bring out the texture.
The sheep of the pasture/wool hex have been painted
black and white.
The plants and the snow on the mountain/ore hex
have been painted green and white.
Finally, the entire hex has been painted
matte clear coat to protect the paint.
I recommend Citadel Matte varnish as it is very thick and very matte.
I did not like this paint on finer detailed models as it was almost
hazy and too thick, but for this scale hex it works fine.
Also avoid, hardware store matte or satin finishes as these are
too glossy to look realistic.
Finally you can see some of the creative ideas that went into the design.
First, note that there is a slightly flat area in the center of
each hex to receive the Settlers production token.
There are also some clear areas at the corners and the vertices
to receive the settlements and roads.
Each piece will be different in base color and in features
to help distinguish the material produces.
There will be no mistaking similar hexes as there is in the game
with the cardboard hexes.
Particularly,
the greens and textures of the pasture/wool and forest/lumber hexes
will be different, as will the colors and textures
of the hills/brick and mountain/ore hexes.
The desert and farm/wheat hexes are also easily confused in the board game.
OK, the hexes are nearing completion.
I have to continue finishing the hexes and get ready for gaming.
In the next part I put it all together and play a game
to see how it all works.
Join me now for the final step:
If you like miniatures, modelling, and historical
battles, you might like Dan Becker's Miniatures Site.