Constructing a 3D Settlers of Catan Board
Part II - Casting the Hexes
This article in four parts describes the construction of a three dimensional board
for the family strategy game The Settlers of Catan.
There are four major steps to making these hexes:
- Prototyping - sculpting and modeling the original piece for the hex.
- Mold making - making a mold that will be used to cast the pieces.
- Casting - repeatedly filling the mold to make hex blanks.
- Painting and finishing - sanding, priming, and detailing the pieces to make the final hexes.
In the previous article we described
Prototype and Mold Making
with the final result being a
silicone mold of the Settlers hexes
we wish to cast.
This article deals with the third step of the process,
casting the resin hexes.

|
|
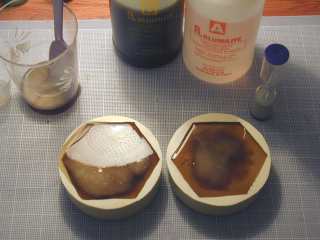
Preparing to make a cast.
|
As with silicone, there are many makes and types of resin.
Resin is a petrochemical product, much like epoxy,
in which two halves of the product are mixed to
chemically react and form a finished solid product.
The specific brand used here is
Alumilite Casting Plastic manufactured
by Alumilite Corporation
of Kalamazoo, Michigan.
Alumilite plastic is a type of urethane
that shrinks very little when it dries
and forms a hard, homogeneous plastic.
The plastic cures in about 3 minutes and is
hard and ready for sanding in about an hour.
This plastic can be cut, sanded, and painted.
In other words, it makes a great modelling material.
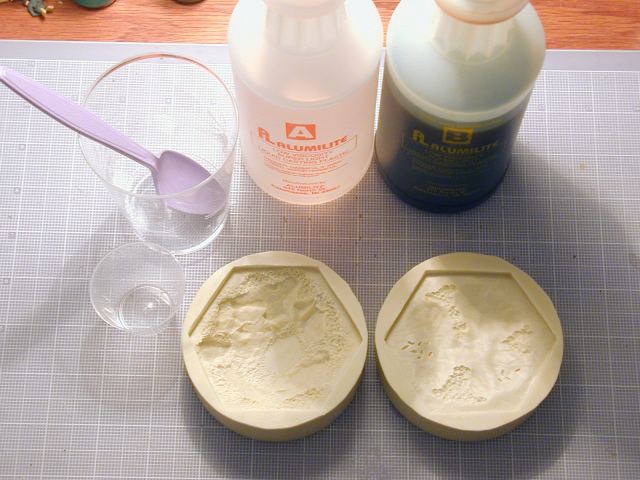
Here we show our molds and our plastic ready for mixing.
The molds have been washed in soapy water to remove all silicone oils
and dried.
Any water on the mold will form a bubble on the finished product.
Two parts of the Alumilite plastic are shown in 28 ounce (0.8l) bottles.
The A side (Propoxylated Amine Polyether Diol), on the right, is the catalyst, which I usually add
to the B side in a disposable cup.
The B side (Aromatic Isocyanate), the dark side shown here on the left, is resinous
and must be shaken before use.
The material gives off some vapors and should be used in a well
ventilated area.
Although the concentrated vapors are harmful, I would say
acrylic and enamel spray paints are much harder on the lungs than this material,
or perhaps I am more sensitive to paint fumes.
Either way, use cautiously.
An egg timer is a very important bit of equipment.
When they say the resin cures in 3 minutes, they mean it.
I have had several pours freeze solid as it was coming out of the cup.
Using the 2 minute egg timer, I know exactly when the
resin will set.
After adding the A side to the B side, I usually stir the resin for
about 30 seconds until it is the color of black tea.
Make sure you stir thoroughly and uniformly
or else you will get discolored and oily parts.
After mixing it takes about 1 minute to pour the resin into the molds.
Pour the resin down a spoon to avoid splashing and to
ensure the resin fills the mold slowly
such that it does not trap any air.
From there you have about 30 seconds to knock bubbles out of
the mold with a toothpick.
You must work fast before it hardens.
|
|
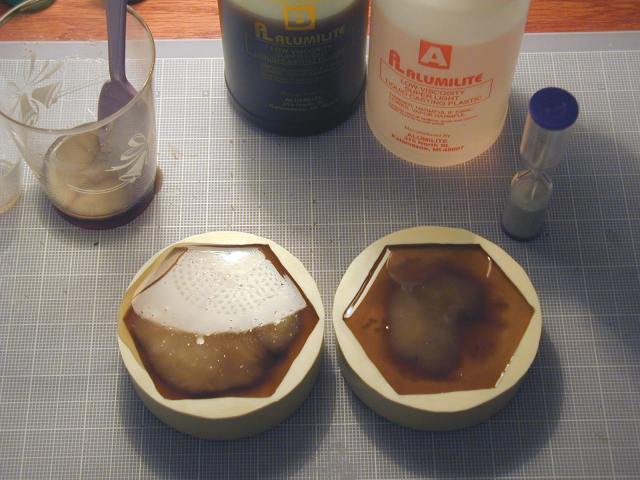
The resin is curing.
|
Here we see the resin in the molds about to cure
at about 3 minutes into the process.
The resin turns from a black tea color to an opaque creamy white as it hardens.
You can see this change in the picture as it hardens
from the center out to the edges.
For these two hexes, I have added 2 ounces (30ml) of A material to
2 ounces of B material.
The resin costs about $0.80 per ounce or about $3 to $4 per hex.
If you buy the resin in larger bottles, it costs about
$0.40 per ounce or $1.50 to $2.00 per hex.
Other companies make cheaper resins, but this one works very well
for modellers.
If you are familiar and work with styrene plastic,
you will also be comfortable and can use the same tools and paints with this resin.
|
|
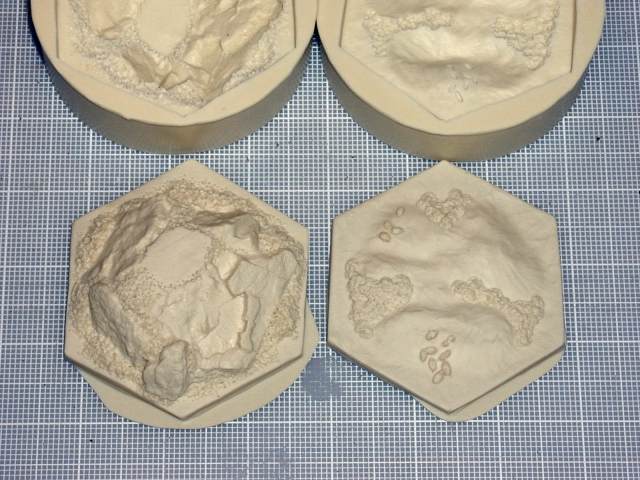
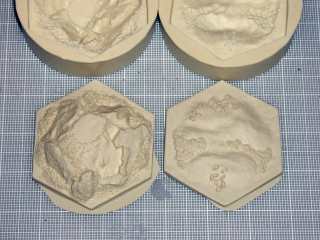
Here are the blanks, fresh out of the mold.
|
Here we have the blank hexes fresh out of the mold.
The blanks eject easily from the silicone mold,
and any adhesion is easily broken by flexing the mold.
With low relief details as shown here, there is no need
to add to coat the mold.
However, my first mold for the forest hex
had very tall conical trees.
It was nearly impossible to get the bubbles out of the resin.
Talc (baby powder) lightly dusted on the mold did help a little,
and I also used a toothpick to knock the bubbles out
but I could never get all the trees filled with resin.
Eventually I gave up and resculpted the trees to be
lower and less bubble prone.
They still look fine.
Also notice the excess flash due to over-filling the mold.
This is easily cut and sanded away.
Finally, as with the silicone, the parts may
be slightly oily as they outgas unmixed products.
Like any styrene model, simply wash your parts in soapy
dishwater to remove the oily residue before painting.
|
|
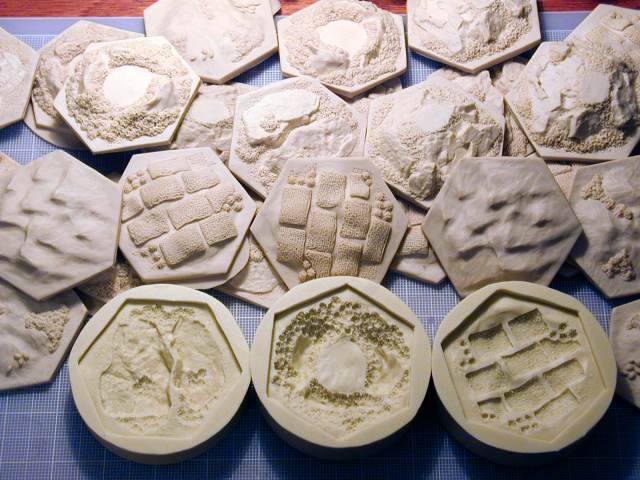
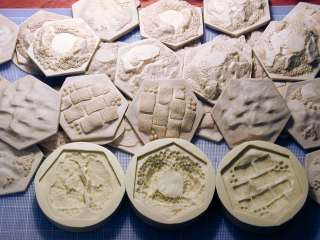
Lots of blank casts.
|
Ahh, this is the fun part of the project - manufacturing
tens and tens of uniform, similar looking parts.
Here I show many blank Settlers hexes that I have produced.
You can see in the photo some farm/wheat hexes, the desert,
forest/lumber hexes and so on.
It is easy to spit these parts out at a rate
of one part per mold per 10 minutes.
However, would I recommend this as a business
or money-making venture?
Not for me.
Although I enjoy doing it for myself,
I do not enjoy the fumes and the manual labor.
For me the fun part came in creating the prototypes
and seeing lots of well-formed parts come out of
the process.
And I'm sure I will have fun when I am gaming
and it's all done.
But stamping out parts for money has no appeal for me.
Now that we have created our blank hexes, it is time to move onto
the next creative step, finishing and painting the hexes.
If you like miniatures, modelling, and historical
battles, you might like Dan Becker's Miniatures Site.