This article shows how to mold and cast a plastic resin model of a Roman Mile Fort. This article is similar in scope to the plastic resin casts made last year to model a 3 dimensional Settlers of Catan game board. This article may appeal to plastic modelers, board gamers, miniatures enthusiasts, and those people who would rather putz around on hobbies rather than do something productive.
As discussed in an earlier Britannia article, I am working on a making an upgraded version of Avalon Hill's Britannia game. I will replace each cardboard counter with a group of four 15 mm figures on 1 inch wooden stand. I also have replaced the game board with a large 1:625,000 scale map of ancient Britain about 8 feet by 6 feet. I am the world's slowest modeler, but I have made steady progress towards finishing the figures.
The game also includes 25 cardboard counters for Roman forts that the Roman player may build as they cross Britain. In keeping with the miniatures theme, I decided to sculpt, mold, and cast upgraded Roman forts for the game. I felt plastic resin would be a good material to make the forts since plastic resin is inexpensive and easy to make 25 copies of an original piece.
For those not familiar with British history, the Roman Julius Caesar first invaded the sceptred isle on 55 B.C.. He did not make much headway, but the Romans returned in 43 A.D. and began conquering the local populace. As the Centurions moved northward, they constructed roads and forts to help solidify their position on the island. In 122 A.D. the Roman Emperor Hadrian built a wall stretching 80 Roman miles (73 modern miles, 117 km) from Carlisle to Newcastle. Every mile, the Romans built a small fort which provided towers for observation, barracks for foot soldiers, and stables for horses. Today, Hadrian's Wall is a World Heritage site in England that makes a fascinating tour. These mile forts are the inspiration for my Roman fort model.
The first, most time-consuming, and difficult step is to sculpt an original piece of which you wish to make a copy. I made my model out of Super Sculpey clay which is a petro synthetic clay which hardens when you place it in a warm (275F 130C) oven. I like this clay for many reasons. First it stays soft and pliable until you harden it in the oven. You don't even need to put the clay in a plastic bag when you store unused clay on the shelf. Second, when molding it does not stick to your hands or tools. Third, the hardened clay is sculptable with X-acto knives, files, and other tools. Fourth, if you need to make changes to your model, simply add more clay features and put the new soft and the old hardened clay back in the oven. The clay withstands repeated "firings." There are all sorts of advantages to this clay.
|
|
|
|
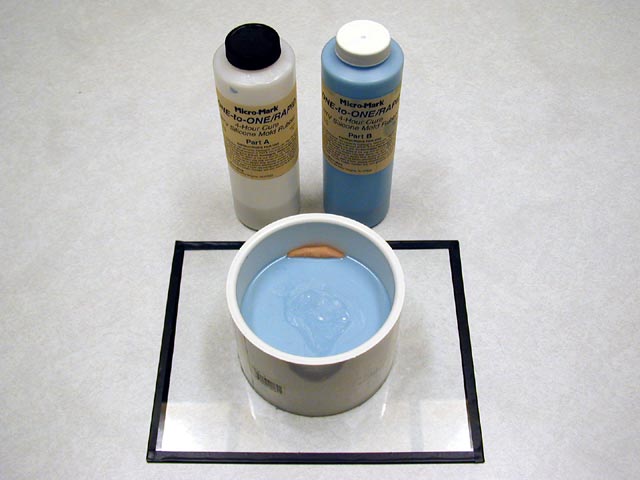
For this mold I used Micro Mark
two part rubber.
It is easy to mix since the rubber comes in two parts that you mix
in equal amounts.
It is also one of the cheapest mold rubbers I have seen at about $10 per pound.
A model of this size requires about 11 to 12 ounce of rubber (2/3 pound).
|
|
|
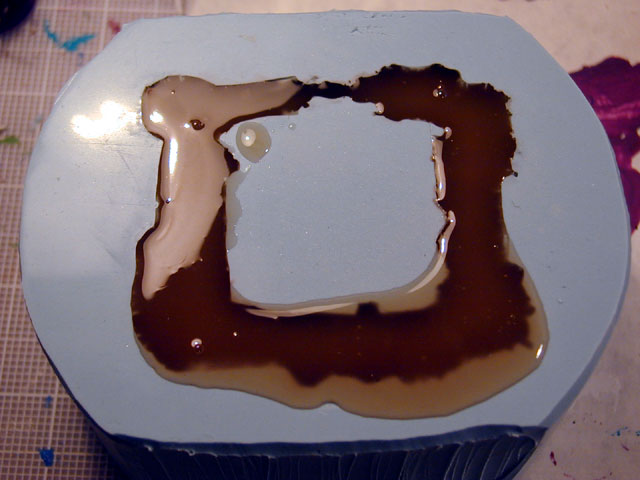
When mixing, you must mix quickly and without bubbles.
You only have about 2 minutes from when the resin turns from
the liquid tea color to the hardened off-white color.
|
|
|
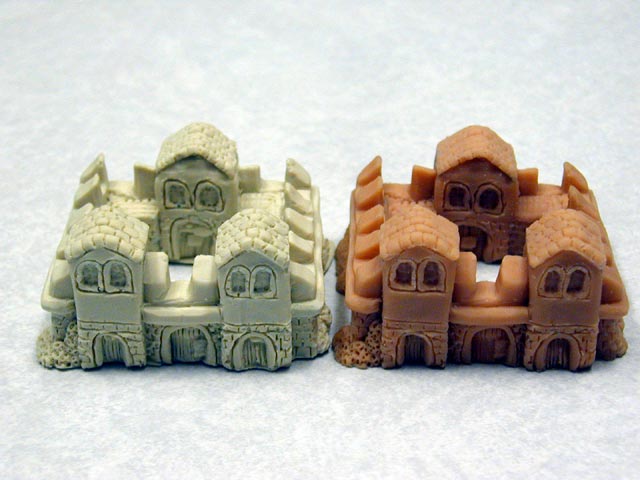
The scale of the model is about 1/2 that of a 15 mm figure.
Yes, this is out of scale with the figures, but the piece
is primarily a gaming piece, and it had to be small enough
so that 25 or more forts fit on the map.
The courtyard is large enough to place a stand of 4 figures.
|
|
|
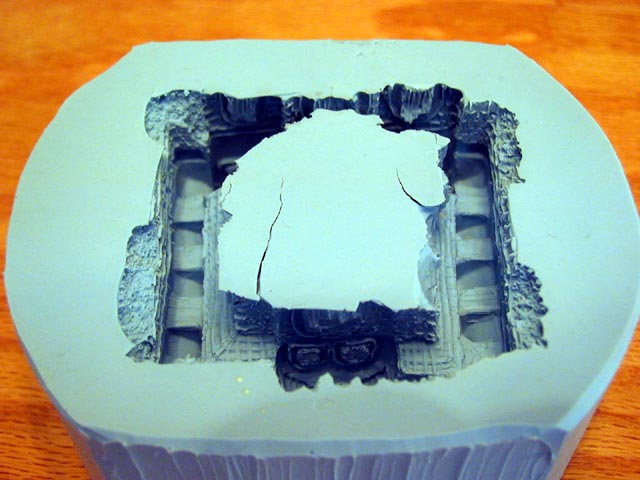
After just 3 resin copies, this mold was unusable.
|
|
|
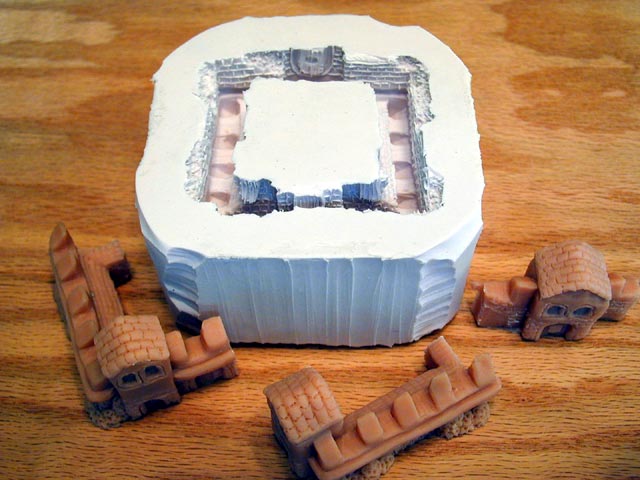
Unfortunately, when pulling the original model from the mold, I ran into the second major snag of the project. My original model broke into 3 pieces. This problem requires that I now make all the plastic resin copies with just this one mold.
The broken model does make a nice Roman fort ruin.
|
|
|
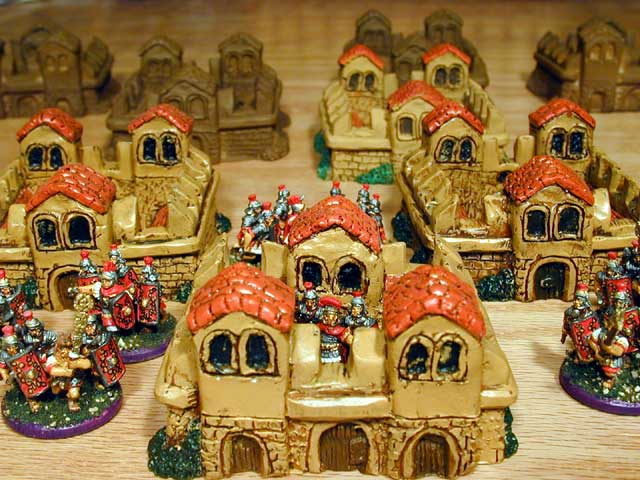
Since I have to make 25 forts, I painted the models very quickly and somewhat haphazardly. First I make a spray a base coat of medium brown. Then I dry brush a sandy brown over the darker undercoat. For the roofs I dry brush orange and red to make a nice tile look. Then I dry brush green on the plants. Finally I spray the entire model with a thick coat of clear finish. After all, these are game pieces that will see much abuse.
The photo at right shows the Roman Mile Fort in action. The Roman centurions are parading, practicing, blowing horns, and doing the things Romans did in these wonderful buildings. Of course this photo shows the many forts placed together for visual effect. In real life, the forts are nearly one mile apart.
That's all for now. I hope these pictures make it easy to understand how to cast plastic resin parts using silicone rubber molds and sculpted clay models. If you make a resin casting, why not send me your story and some photos of your art work.
There are more articles on Britannia at the
Britannia page
and many miniatures-related articles at
Dan Becker's Models and Miniatures Site.