Dan Becker's - More Otto Guitar Amplifier Mods
|
|
The Otto 8 watt Guitar Amplifier Output Transformer Section
|
This article is a continuation of my previous article
Power Scaled Otto 8 watt Amplifier Build.
In this article I show more of the changes and modifications made to
this little powerhouse tube amplifier.
I install a 3 tap output transformer to support 4, 8, and 16 ohm speaker cabinets.
Additionally, I debug and replace a fried London Power SB-84 power scaling circuit.
If you want to skip the build description and just hear the amplifier,
jump to the sound clips.
The basis of this power-scaled amp is a build-it-yourself kit guitar amp
designed by Gerhart Amplification and sold by
Guytronix.
This design is a 12AX7WA preamp tube driving two EL84 power tubes in a push-pull configuration.
The makers call this design the Ardmore, but affectionately I call my instance the Otto,
and I have a detailed article of its building.
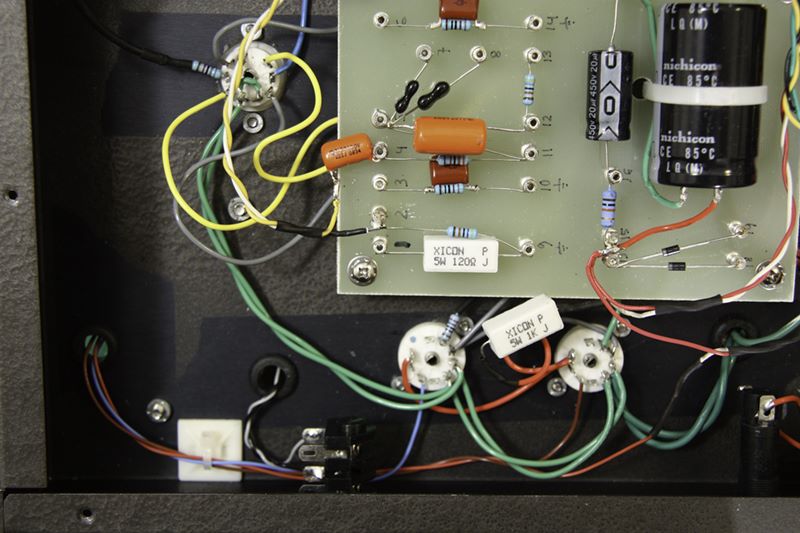
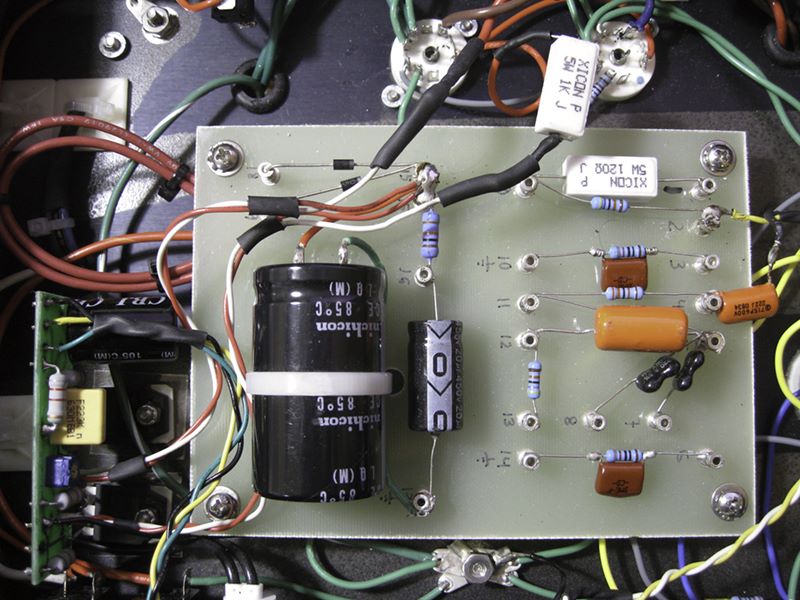
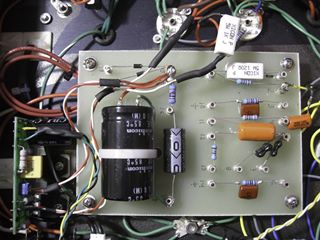
The first photo shows the power output section of the guitar amplfier.
The amplifier circuit board is at the top left.
It takes the guitar signal from the preamplfier tube whose
socket is shown at the top left.
After processing, the amplfied signal is passed to the output tubes
whose sockets are shown at the bottom center.
This power design is known as a push pull design as each tube amplfies
the power for one half of the output signal.
These two tubes deliver their signal to the output transformer
via the 3 wires heading to the transformer on the other side of this box
at the lower left of the photo.
After transformation, the signal returns via the two wires from the grommeted hole
and
attach to the jack at the bottom edge of the photo.
The main limitation of this one-jack design is that the guitar amplfier can only
drive an 8 ohm speaker cabinet.
Many dual speaker cabs require a 4 ohm or 16 ohm jack.
So in order to increase flexibility, I would like to update this 1 tap, 8 ohm
transformer to a 3 tap, 4/8/16 ohm transformer.
It appears to be a simple modification,
disconnecting the 3 wires for the transformer primary (input) winding
and connecting 4 wires for the ground and tap wires for the transformer secondary (output) winding.
|
|
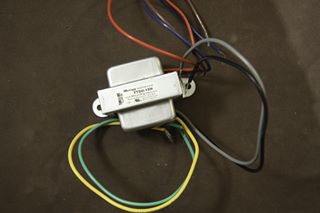
Mercury Magnetics 3 Tap Output Transformer
|
This photo shows the Mercury Magnetics 3 tap output transformer.
The model number is the FTDO-15M which is a work alike to
the existing Ardmore kit.
The red, brown and blue wires are for the transformer primary (input) winding.
The black, gray, yellow, and green are the transformer secondary (output) winding.
|
|
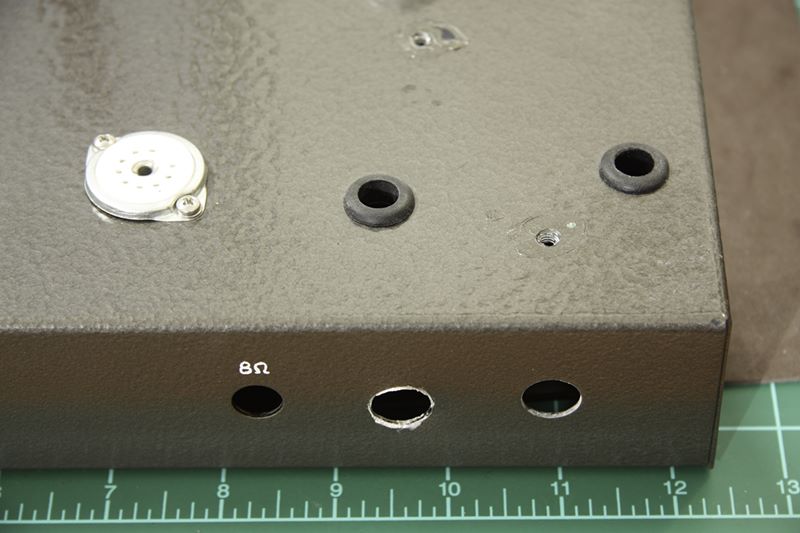
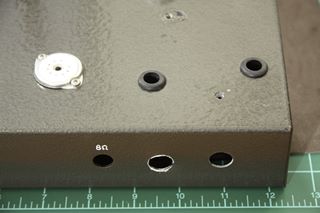
Project box modifications
|
This photo shows modifications to the Otto amplifier project box.
In addition to the existing 8 ohm output jack hole,
I had to add new ones for the 4 and 16 ohm jacks.
Notice how the existing hole done with a metal hole punch is
much cleaner than anything you can do with a drill press.
I'll be rearranging the order of the jacks so they go
in 4/8/16 ohm order.
|
|
Primary wire hookup
|
This photo shows the hookup of the output transformer primary wires (red, blue, and black)
from the project box gromment to the output tubes.
The brown and blue hook up to the drive pins of the output tubes.
The red is the common wire that goes back to the input power supply.
|
|
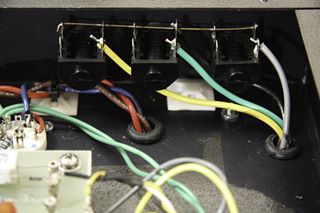
Secondary wire hookup
|
This photo shows the hookup of the transformer secondary wires to the speaker
output jacks.
For this output transformer, yellow is the 4 ohm wire, green is 8 ohm, and gray is 16 phm.
The 3 output jacks are all commonly grounded by a bit of brass wire. The black ground
of the output transformer is hooked to the middle jack ground.

|
|
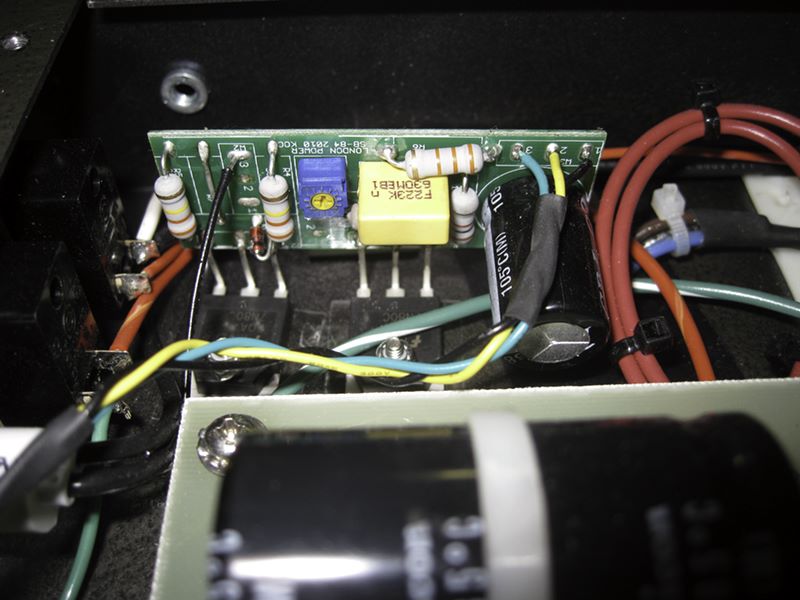
Old London Power SB-84 Board
|
Set back.
After a relatively simple install of the new output transformer,
I attached guitar and speaker, and
powered up the Otto amplifier.
Nothing.
I debugged a bit with my digital multimeter, but could not
find the problem.
The tubes were getting filament power, but no signal
was getting through to the output transformer.
At first I thought it was a faulty output transformer, so
I swapped back the old one, but still no sound.
So I reinstalled the new output transformer and brought the
amplfier along with a few schematics
to the people at Austin Amplifier.
These guys are a great straight-shooting establishment, and they saved my
lame electro-technician ass more than once before.
The amp tech was really interested in my home brew kit amp.
He had never seen a power scaler circuit before, and was
very curious and groked the basic function of the circuit.
After hooking up the signal generator and an oscilloscope, he
determined that the old London Power SB-84 board (shown here) was inoperable.
We removed it from the amp, and the sound came through loud and clear.

|
|
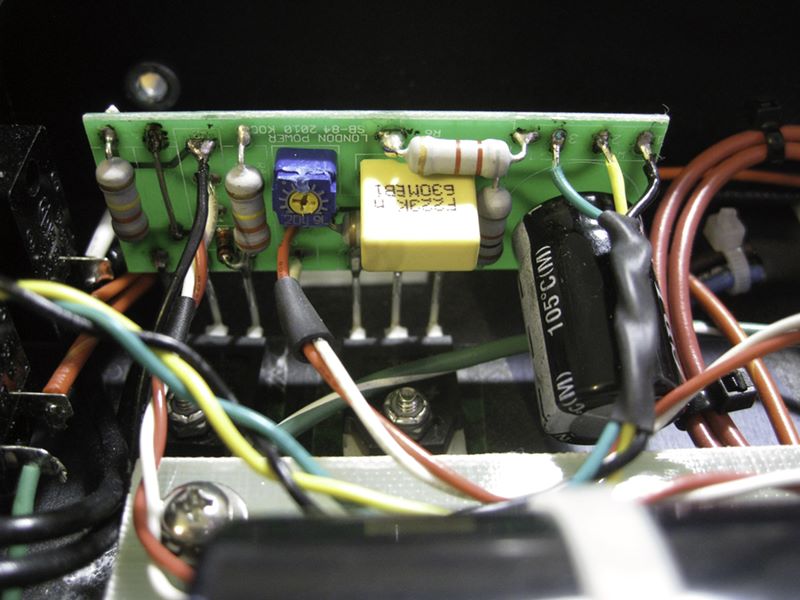
New London Power SB-84 Board
|
I really do like the sound and flexibility of a power scaling circuit.
It fools the output tubes into distorting at lower volumes by lowering
the tube power and plate voltages proportionately.
It does this without varying resistance or dissipating signal power.
So I bought a new London Power SB-84 (shown here), and installed it in
place of the old board.
The blue trim pot on this new board is a bit chewed up. It was missing
from the kit, so I desoldered and used the trim pot from the old power scaling board.
|
|
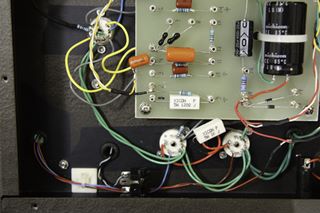
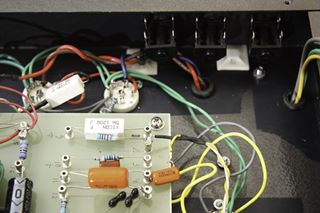
Reinstalled power scaler circuit
|
This photo shows the reinstalled power scaler circuit on the lower left.
This board takes the drive signal heading to the output tubes
and scales it along with the signal heading to the output transformers.
By scaling down the tube power supply, the drive signal comes close to
the tube power rails and gets into the distortion region.
|
|
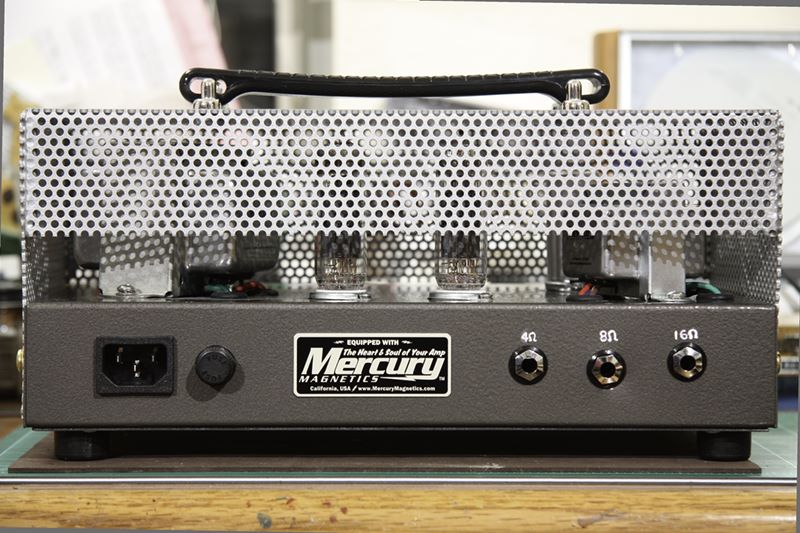
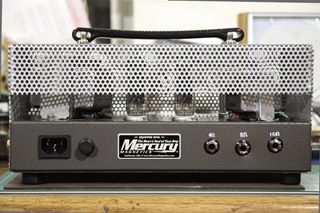
Back of the amplifier
|
This photo shows the reassembled amplifier.
Notice I was a little sloppy with the alignment of the 3 speaker jacks.
I also put a Mercury Magnetics nameplate back there.
It makes the amplifier look a little less home-brewed when you
have some product labels.
Perhaps I need to put some warning "Danger High Voltage" labels there as well.
"Do not lick the amplifier while it is plugged in."
|
|
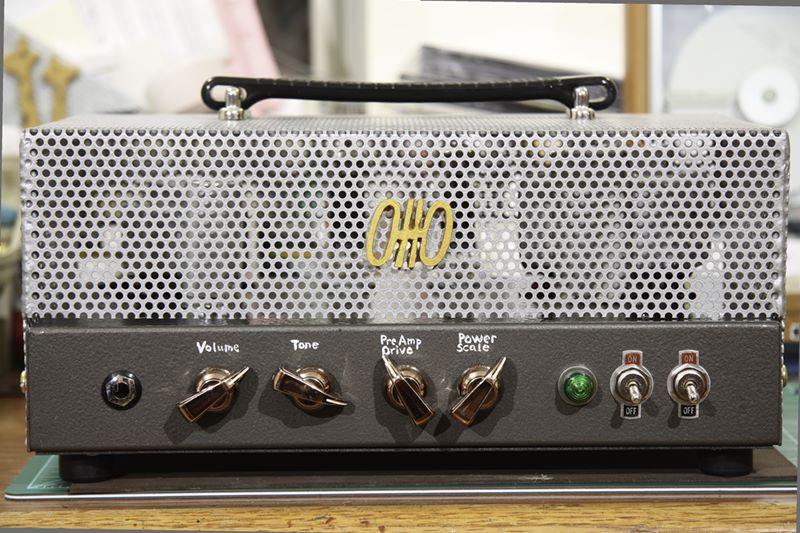
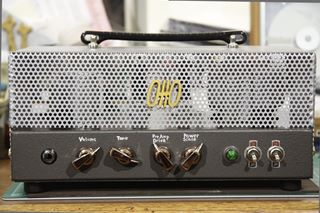
The Front of the Otto Amplifier
|
This photo shows the front of the Otto amplifier.
The basic Ardmore amplfier kit comes with volume and tone controls.
The London Power power scaling kit adds the preamp drive and power scale controls.
Notice that I goofed a little on the additional controls. I was intending to leave
space to keep the controls aways from the jewel light.
However, I goofed my measurements and the preamp drive and power scale control knobs are a little too
close together.
Oh well, no effect on the sound as you may hear in the next section.
Sound clips
All clips recorded via the Otto 8 watt amp, Vox Virage guitar, closed-back 12" Eminence Red Coat
"The Governor" cabinet, Sennheiser e908 condenser mic, and Zoom R16 preamps, DAC, and recording interface.
No processing is applied to the recording except to normalize the volume level.
- E Major - this is an E major
scale and played on the both the neck and bridge pickups, clean, with low drive and low volume.
- G Minor - this is an G minor
scale and played on the both the neck and bridge pickups, overdriven with lots of preamp distortion.
- D Sevenths Harmonized - this is a set of
harmonized D chords (I-ii-iii-IV-V7-vi-vii°-I) played on the top 4 strings clean with no overdrive.
- E Sevenths Harmonized - this is a set of
harmonized E chords (I-ii-iii-IV-V7-vi-vii°-I) played on the lower 4 strings with lots of overdrive.
scale and chord played on the neck pickup, clean, with low drive and low volume.
- Dan's cover or Stevie Wonder's Signed, Sealed, Delivered -
this the guitar part of a section of the song. My favorite part is the descending sets of E chords
that end in the full open E leading to the next verse.
- Dan's cover of Marvin Gaye's What's Goin' On? -
this the guitar part of a section of the song. Just a little bit of overdrive and break up on
the hard strikes.
Thanks for visiting the site and reading the article.
I hope you enjoyed the detailed photos and comments
and had fun listening to the sound clips.
More articles are found at the parent
Guitars and Music page.