The Ale Knights Town Pub
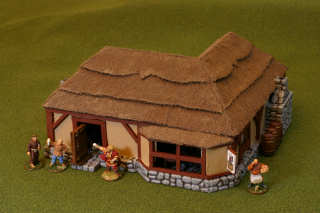 |
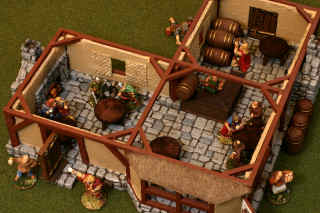
| The front of the pub |
This page describes a miniature building made for wargaming, skirmish,or roleplaying games.It is built with commercially and scratch built materials andgoes well with 25mm to 28mm figures.One of its prime uses is withTod Kershner's Pig Wars rules andmy Pillage the Village scenario ruleswhich requires both interior and exterior areas for searchingand looting.As you can see in the photo, the pub has a stone foundation, timber framing, wattle and daubwalls, and a thatched roof.There are two doors, a front bay window, andinterior room for a bar, four or five tables, and the patrons.The architecture and function is of the Medieval timeframe,but the construction would have been possible back to the late Dark Ages.And the simple design could be used all the way to the nineteenth centuryas a village tavern or pub.
 |
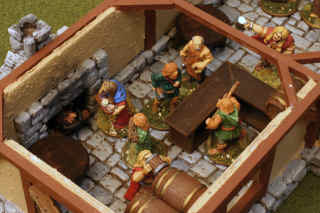
| The interior of the pub |
This photo shows the interior of the pub.There are two fireplaces - the front one for warmth andthe back one for cooking.If you look closely, you will see miniature logs anda kettle in the hearths.There is an "L" shaped bar with roombehind for a bartender and plenty ofspare kegs (from Lara's Crafts doll house accessories).The patrons sit or stand around tables made with woodendisks and dowels.The front and back doors are madefrom two sets of Hirst Arts doors (from theFieldstone Accessories mold #71) glued back toback and held upright by a small rectangular basewhich allows them to be opened, closed, or kicked-in.
 |
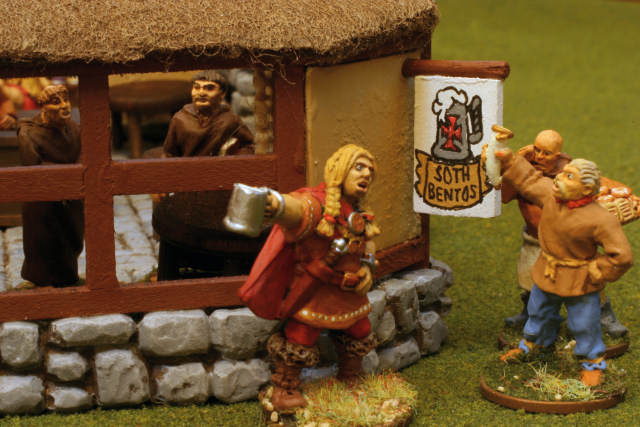
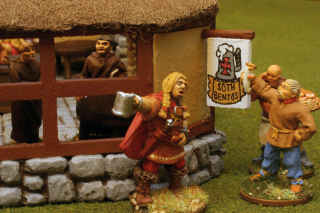
| The back of the pub |
Here's another view of the back of the pub.The barkeep serves up some ale.The women are serving food cooked over the back fire.TheKetilbriðr samples some ale from a bucket from the barrels.Life is good.
 |
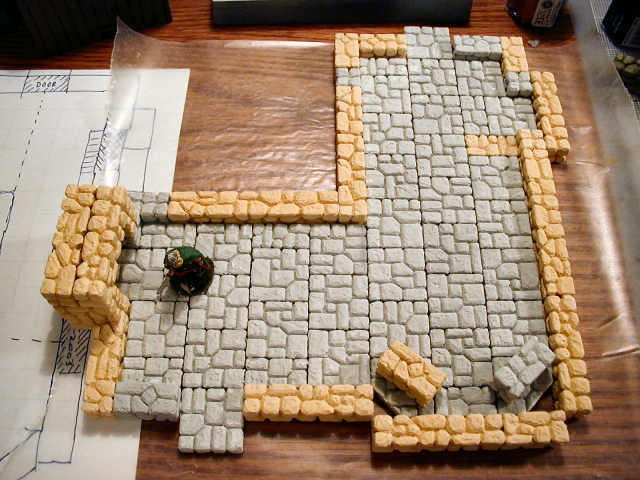
| The stone floor plan |
The floor of the pub is made from dental plaster (my brand isExcalibur) and theHirst Arts flagstone floor mold #260 andfield stone wall mold #70.As is with many ancient buildings, only the flooring is stone.You can see the floor plan drawn on graph paper at the left of the photo.The basic plan is 3 rectangular areas.A fireplace and a door are added to two of the areas.Add extra floor tiles to make the doorway threshold andthe base of the fireplace.A bay window is added to the third area.Cut blocks with a Dremel tool or handsaw to make the45 degree angles of the bay window.
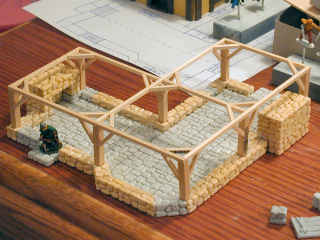 |
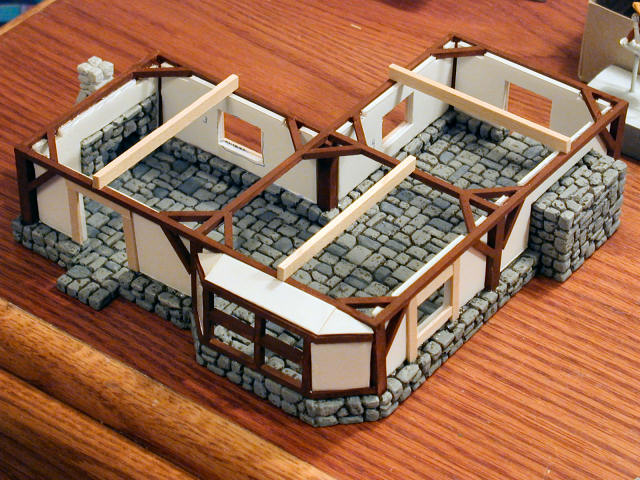
| The building frame |
The frame of the building is made with Midwest Products bass wood.The posts are glued into holes drilled intothe plaster.The wood is glued with simple craft glue.I use Elmer's tacky glue called Craft Bond.The corner braces are somewhat overkill, asthe structure is quite strong without them,but the braces definitely make the structure lookright.The additional beams across the middle of the ceilingare really not needed.The next time I think I will leave these out toallow greater access to interior figures and furniture.
 |
| The base coat of color |
The walls are made with 1 to 2 mm thick foam core card stock.Simply cut panels with a razor knife to fit against the beams.If you make your posts twice the thickness of your walls,the foam core will fit nicely into the interiorof the beams.Once the foam core is painted, it will look much likewattle and daub (wicker mats stuccoed with mud, clay, and dung)which was a very popular building material in the middle ages.Also note that some extra basswood planks have been glued aroundthe doors and windows as was done at the time.The flooring has been painted various shades of field stone grey.The beams have been painted a ruddy mahogany brown.
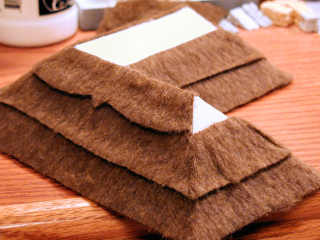 |
| The thatched roof |
The roof sublayer is made with card stock or matte boardwhich is used for framing pictures.Cut the card stock with a razor knife and glue togetherwith craft glue.I also glue some bass wood underneath the roof to simulaterafters and to keep the roof from bending or warping.See the previous photo for three of the unpainted bass wood rafter beams.The thatch roofing is made from teddy bear fur froma cloth store (such as Jo Ann's Fabrics).I use brown colored fur as most older thatch I see is light grey or tannish brown.Newer thatch is a beige to tan hay color or sometime greenish if it is stillnot fully dried.As many thatchers often do to sign their work, I have added a fancydesign on the upper course.
I dry brushed the fur with lighter tan and grey.However it is tough to paint fur, and it came out a bit splotchy.Also, when I moistened the fur to take the paint more readily,it soaked the card stock and caused the roof to warp.As it dried I had to carefully form the roof back to itsoriginal squared shape.
 |
| A toast to the Ale Knights |
The finishing touch had to be my own hand painted sign.Here I use the Ale Knights logo asa welcome sign for drunkards everywhere.Lift your glasses, toast to the Ale Knights, andhave a drink with us at the Town Pub.
More miniatures-related articles are atDan Becker's Miniatures and Models siteor theMiniature Terrain pages.Thanks for stopping by and reading about my figures.