Transmogrifying Sauron


Game Contents
Contents of the game
This page discusses how to upgrade the Sauron figure in Reiner Knizia's Lord of the Rings board game. As you may know, Lord of the Rings is a series of 3 novels by J.R.R. Tolkien and a prequel The Hobbit which has sold over 100 million copies. A
major motion picture by Peter Jackson will be released in December of 2001.

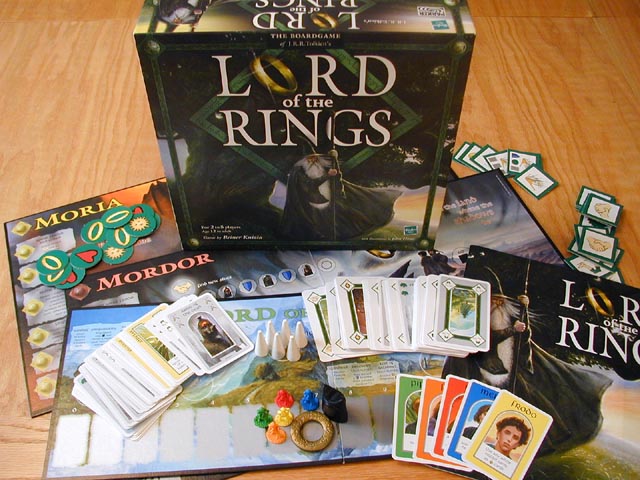
The game is fun to play and very unique in that all 2 to 5 human players together try to defeat the evil Lord Sauron and toss the ring into the volcano of Mordor. In other words, the players cooperate to defeat the game. Through skillful use of cards and careful alliance and sacrifice, the players cooperate to beat the game.

As shown here, the game has many boards, cards, counters, and game pieces. The illustrations are by John Howe, a Canadian, who is one of the most acclaimed illustrators of Tolkien's works. The game was released in Germany by Kosmos in 2000, in the United States by Hasbro in 2000, and a second edition by Wizards of the Coast (a division of Hasbro) in 2001. For more information, rules, Frequently Asked Questions, and reviews, see Chris Lawson's excellent site ReinerSpiele - the Games of Reiner Knizia.

Sauron and friends
The main characters
The main characters in the novel and the game are the Hobbits who bear the ring, Frodo, Sam, Merry, Pippin. The game adds the minor character Fatty to round out the band of five. The most interesting character is Sauron, who is represented somewhat abstractly in the game by the "Batmanesque" plastic resin figure shown here. It is very groovy, painted all black, with batlike ears and a single eye painted red. Like Janus, this Sauron has two sides with an evil eye facing forward and backwards at the same time.

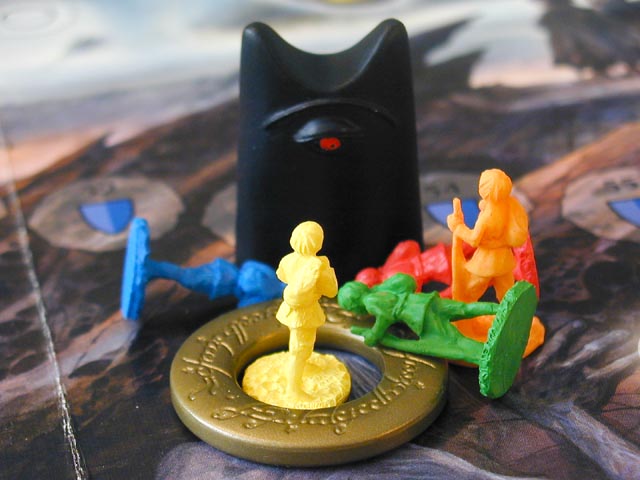
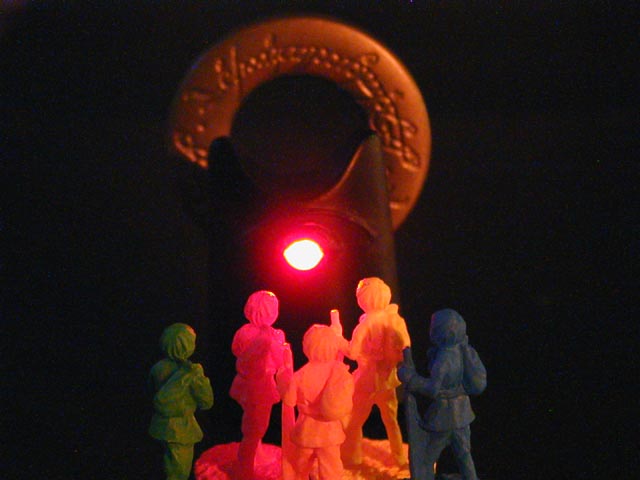
In this photo, Pippin Sam, and Merry have succumbed to evil and are bowing down to Sauron. Frodo, the ring bearer, and Fatty trudge on, defying Sauron, not yet defeated, and hoping to destroy the ring. Oh no! Frodo is wearing the evil ring!

Materials
The things you need for this conversion
OK, enough exposition, and now on to the point of this page. The goal is to upgrade the Sauron resin figure to make a delightfully evil addition to the game. To do this, you need to go to an electronics parts store such as Radio Shack (in the United States) and pick up the two parts shown here. First, you need an LED (light emitting diode), preferably one that is red. Here is Radio Shack's part 276-208 which is a 5 volt, 5 mm LED with an integrated resistor. That means that you can hook it directly up to a battery without immediately draining the battery, causing heat, and a possible fire hazard. Admittedly that would be really cool to play this game and suddenly have the plastic Sauron figure burst into flames and melt all over the game board. Perhaps that will be the next article here.

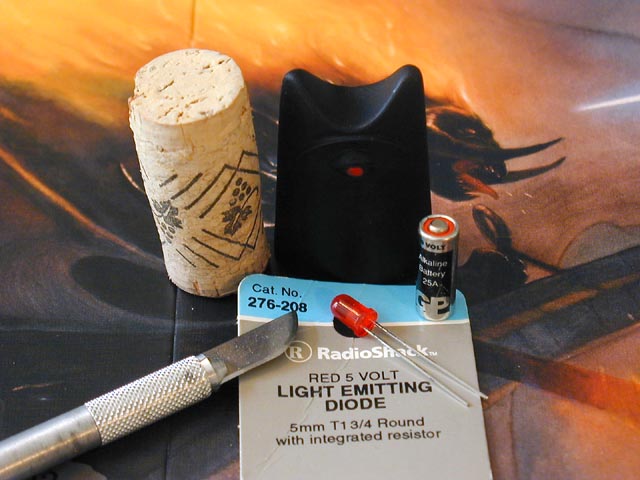
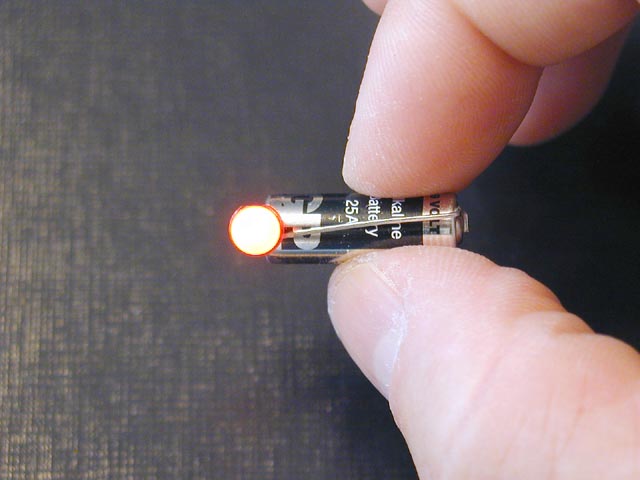
But I digress. You also need a battery that will provide at least 5 volts. Here I selected a tiny 9 volt battery used in hearing aids and car alarm transmitters. You will also need a wine cork and some basic modelling tools such as an X-Acto knife, needle nose pliers, some glue, paint, and modelling putty.

You also need one evil Sauron resin figure from the game.

LED Leads
Bend the LED to touch the battery terminals
The first step is to take a needle nose pliers and bend the LED leads to touch both battery terminals. It helps to make several right angle bends to form a sort of spring that will touch the battery terminals under pressure.

Sauron looks on at our project with evil delight.

Battery and LED Test
Test the battery with the LED
As a test, place the battery in the cradle that you formed with the LED leads. This will tell you if the battery is dead or the LED is defective. Under normal use, the LED should last a life time. The battery will last many many hours. At this point, I do not know how long the battery will last, but after 4 or 5 hours of gaming, the LED shows no sign of dimming.

Eye hole
Imagine the Mormon Tabernacle Choir
with 9 inch Knitting Needles in their eyes.
Next drill out the interior of Sauron. Here I use my drill to drill out the eye hole. Drilling into resin is easy. It is a bit stiffer than styrene plastic, but a wood drill bit bites nicely and scoops out the plastic easily.

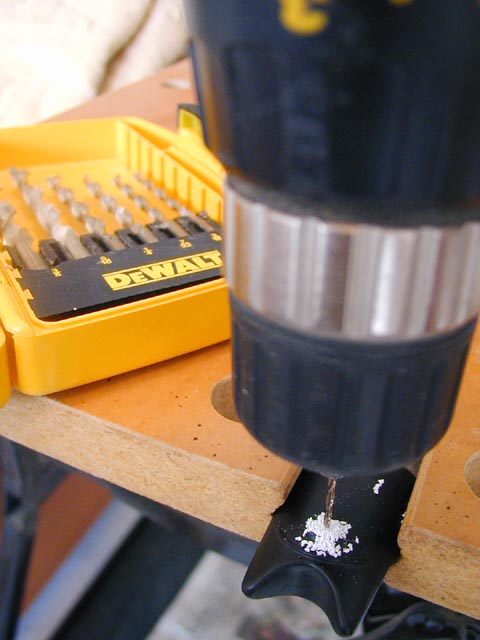
To get the hole dead centered in the eye socket, drill a pilot hole and use pressure to move the drill bit left or right if it is off center. Then move on to the correct size drill bit for the LED. Since the LED is 5 mm, use a slightly larger bit to accept the LED in the eye hole.
Body cavity
Drill the body cavity with a larger bit.
Drill the body cavity of Sauron with a bit large enough to accept the battery and the LED. As with the previous hole, use a smaller drill bit to make a pilot hole to ensure you are on target and centered. Then move on to the larger bit.

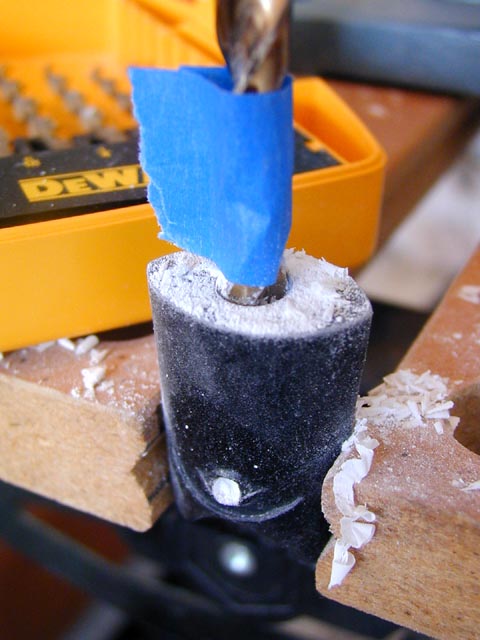
Notice the blue masking tape on the drill bit. This ensures that I don't drill too deeply out the top of Sauron's head.

Ahhh, resin drills nicely. See how it flakes and is easily removed. Notice also that Sauron is made of white resin painted black. I think this symbolizes that he is good inside, only covered by a black evil veneer.

Battery in hole
Insert the battery and LED in Sauron's body cavity.
The next step is to insert the LED and battery into Sauron's body cavity. This photo shows the LED protruding out the eye socket hole. There is a slight bit of play of the LED in the eye socket, perhaps about 0.5 mm around the edge. As shown, a pair of needle nose tweezers will help push the contraption into the body cavity.

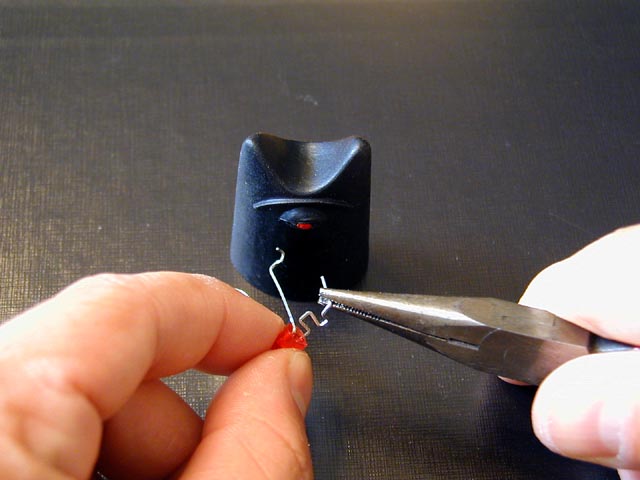
The tweezer can also make adjustments to the LED leads in the body cavity. The lower LED lead does not quite touch the battery terminal. Thus the battery and LED circuit is normally open and the LED is not lit. Pressure from the closure will force the lead to touch the battery terminal and turn the light on.

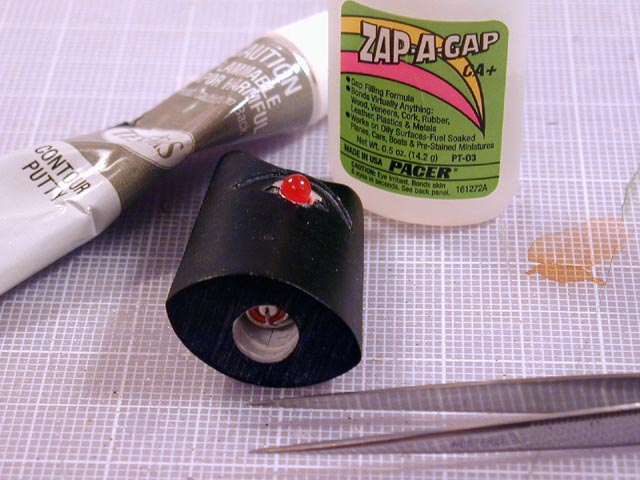
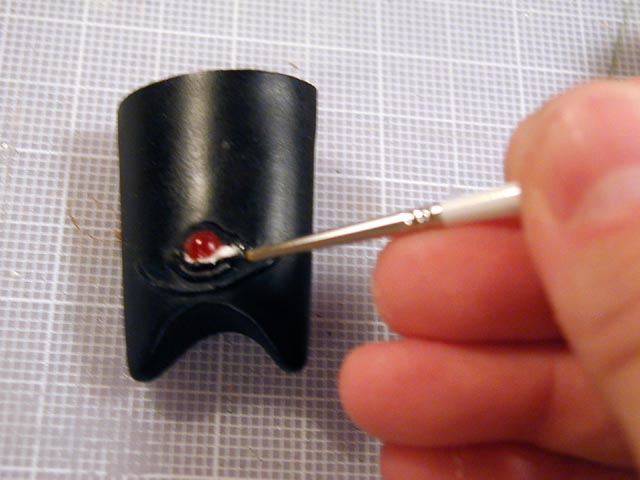
Also shown are modelling putty (Testor's) and cyano-acrylate glue (Zap a Gap) that will be used to touch up the eye and complete the model.

Putty and cork
Touch up the eye with modelling putty.
Glue the LED to Sauron's body with cyano-acrylate glue such as Zap a Gap. This glue will hold the LED in place and prevent any shifting. Be careful not to get the glue on your fingers or on the clear red lens of the LED. Use a toothpick to carefully apply the glue.

Once the glue has dried, touch up the gap with modelling putty. Mold a pair of eye lids with the putty. Use a toothpick to shape the lids and to remove excess putty.

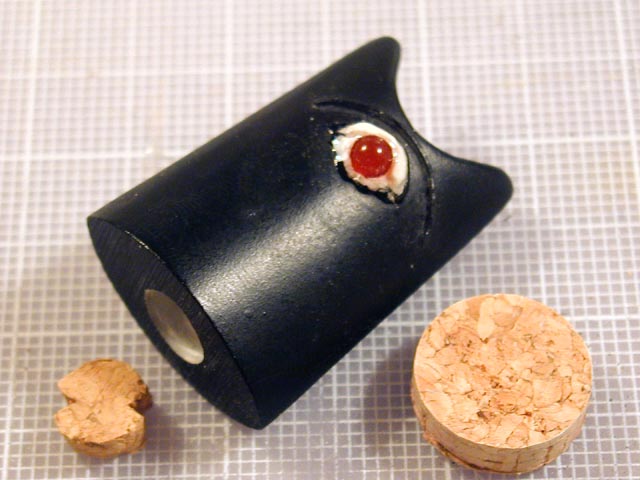
Ask Mom and Dad to drink a bottle of wine and give you the cork. Using a razor knife (X Acto), cut the cork to the appropriate thickness. The cork must not protrude from the base of Sauron, but it must be thick enough to apply pressure to the LED lead to make the battery and the LED complete the electrical circuit. After cutting the cork to the correct diameter of Sauron's body cavity, I used an emery board to sand and smooth the cork to the correct shape. I also cut two notches in the edge of the cork to allow tweezers or a toothpick to pry the cork from Sauron's body. In other words, "cork in" means that the circuit completes and the LED lights, "cork out" means that the LED is not lit.

Paint the eye
Paint the putty to match the body.
Finally, paint the putty to match Sauron's body. Here I use ordinary water based acrylic paint (Citadel) to paint the lids black to match the body.

We Obey
Enjoy your evil creation
Now stare into the evil eye of Sauron. Here all five Hobbits are lost and transfixed by the red and piercing eye. It's too late, they have moved to the dark side. The ring is lost as well and in Sauron's possession.

Perhaps you feel a strange attraction to Sauron's penetrating glance as well. See how the eye calls to you. The ring. The eye. Sauron. Quickly, look away or else you will be compelled to upgrade your Sauron as well. A curse. An improvement. Sauron calls to you. The red and piercing eye. It must be done. You must upgrade Sauron in Reiner Knizia's Lord of the Rings board game. Do it. Now.


Home| Top| Ale| Flight| Games| Guitars| Miniatures| MTB| Podcasts| Poophead| Trains| Tri| Other Hobbies| Weather| Feedback
Last modified: Sunday, 28-Apr-2019 13:56:55 MST.